
Option-drag Sharpening
The photo turns grayscale, so you judge sharpening on brightness alone. Let go and your photo is back in color.
Sharpening · Radiant Raw and Radiant Photo
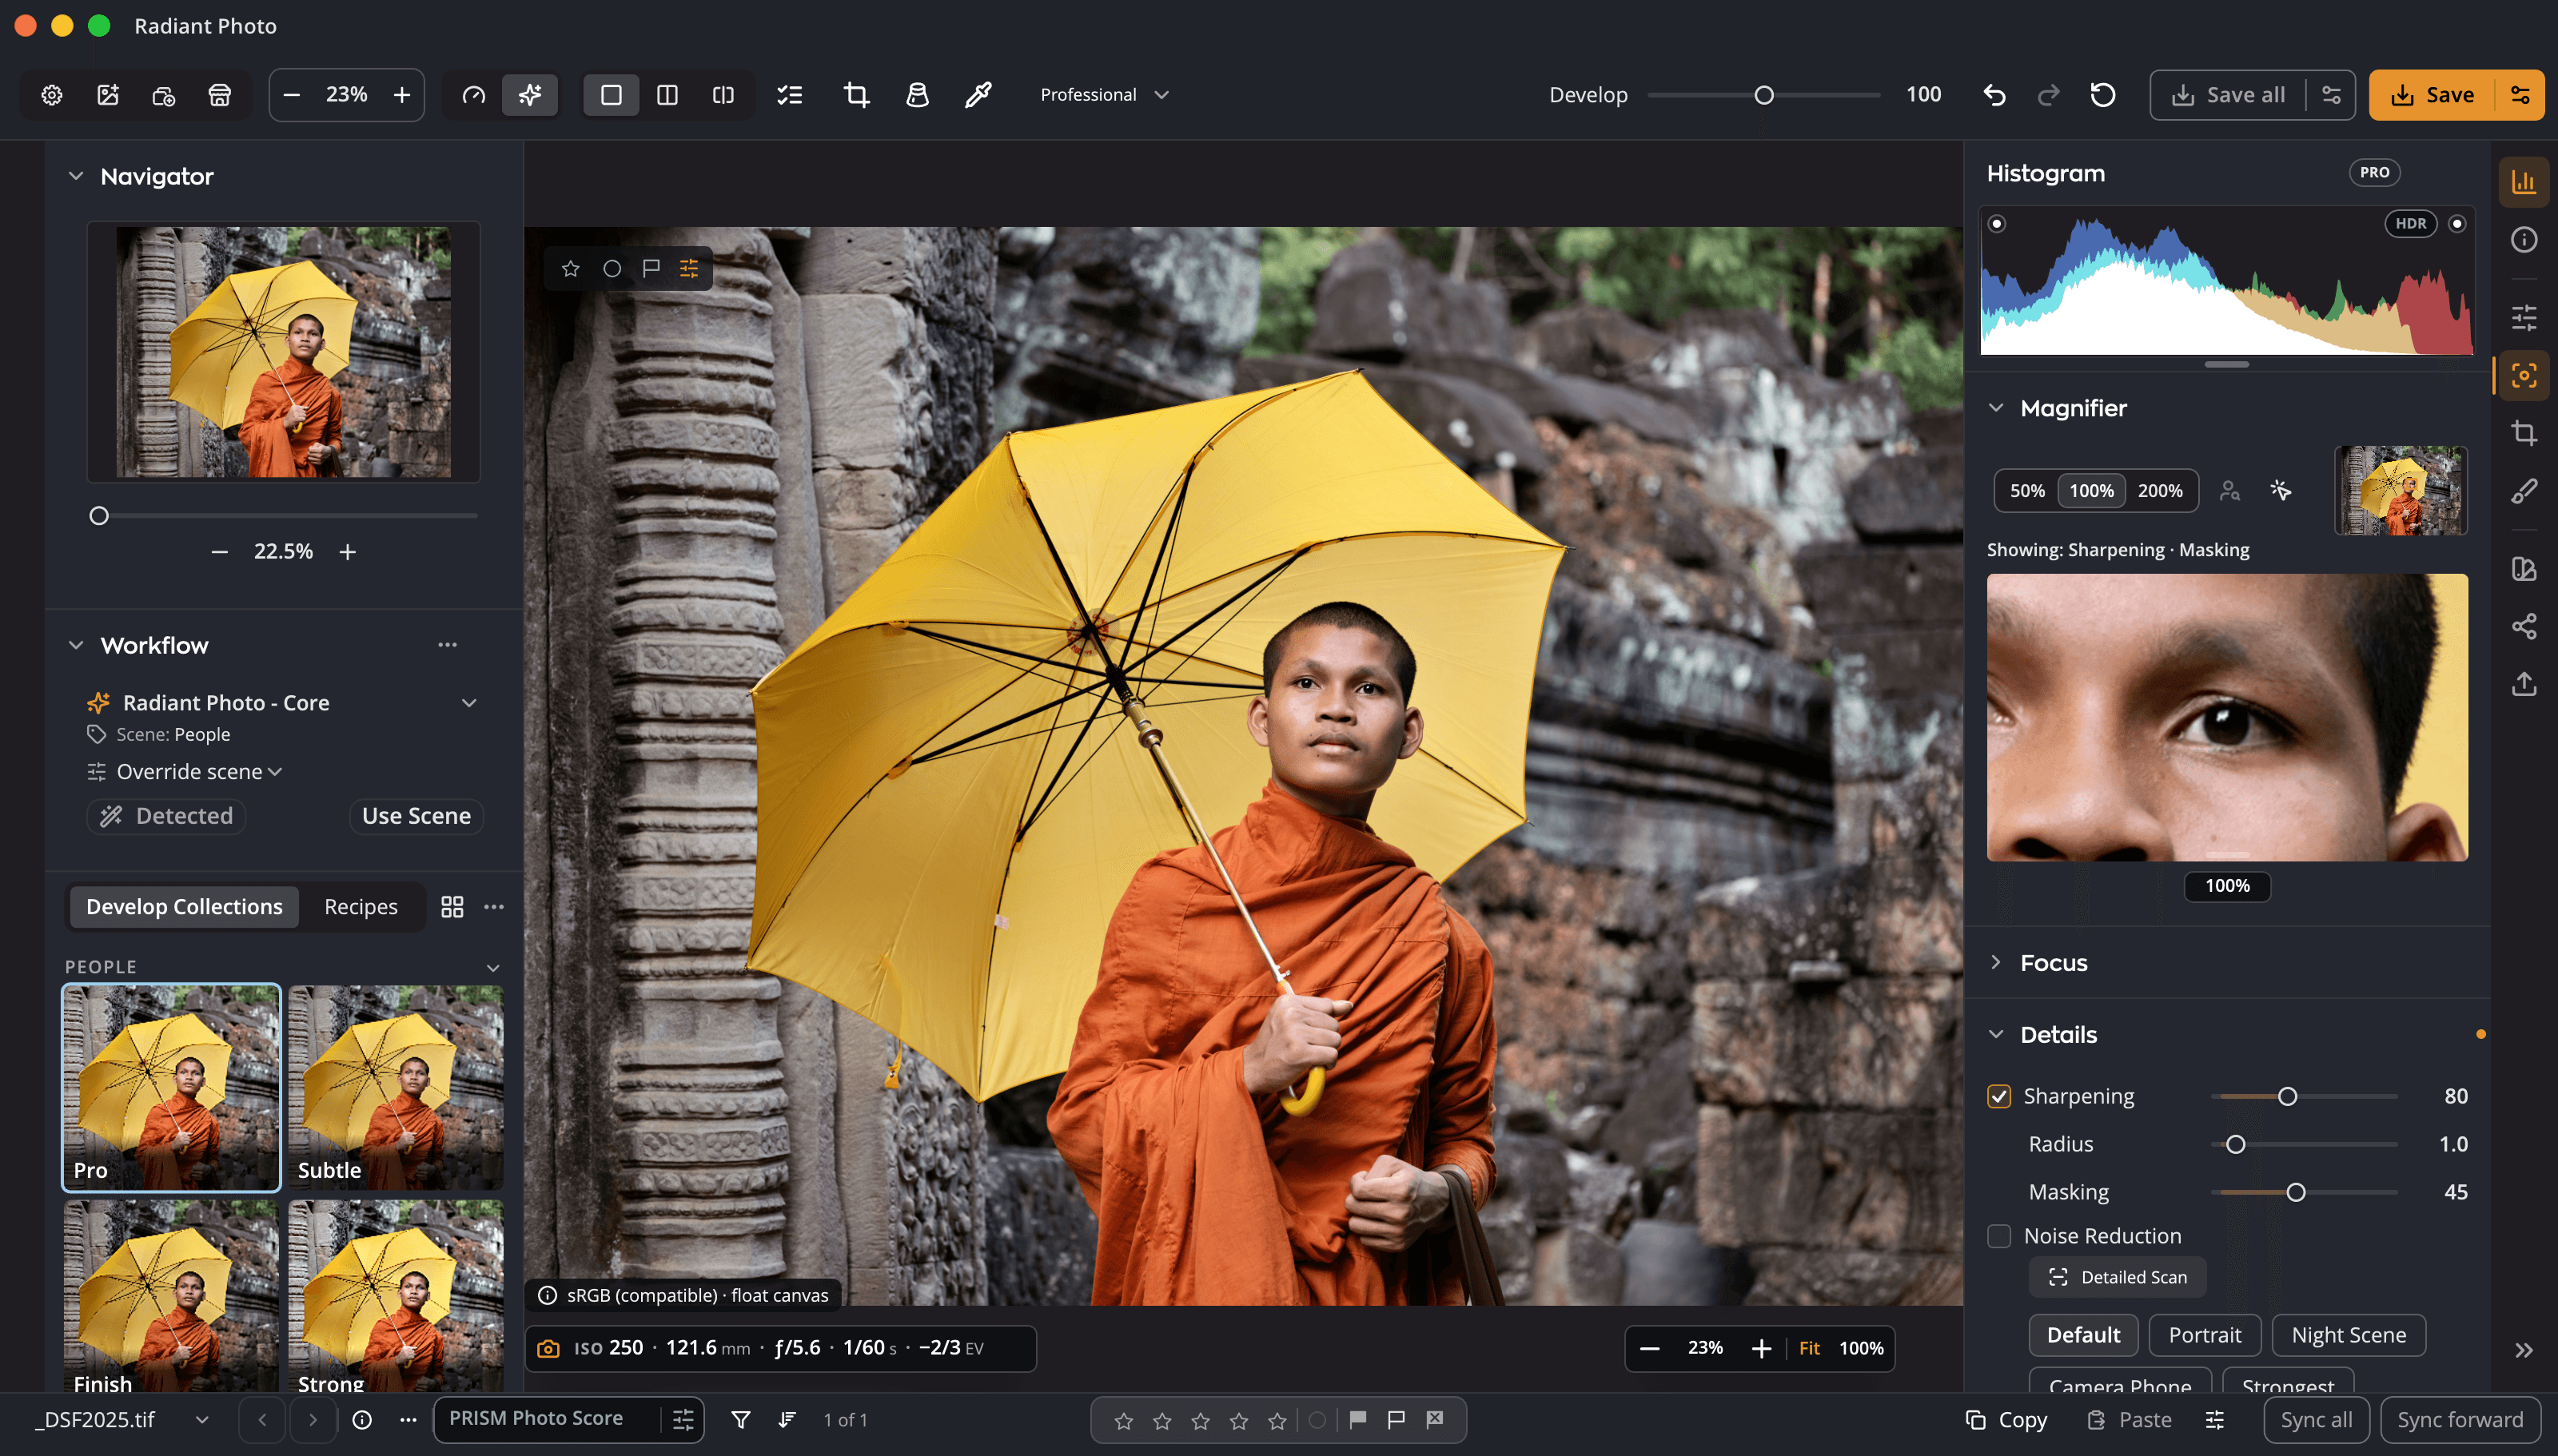
Sharpen the detail, not the blur behind it. Masking keeps sharpening on edges and texture and holds it back from smooth areas such as sky and out-of-focus backgrounds, with no hard line where it stops. Hold Option (Alt on Windows) as you drag to see exactly what you are changing.
Try it here
Amount sets how much, Radius how wide. Then raise Masking: sharpening stays on edges and texture and eases off the smooth background. Show the mask to see where it applies, white for sharpened and black for protected.

Drawn by your browser on a detail of a finished photo, to show the idea. Radiant sharpens your full-size photo with its own filter.
Smooth Masking
Masking keeps sharpening on edges and texture and holds it back from smooth areas such as sky and out-of-focus backgrounds. As you raise it, sharpening fades out gradually, with no hard line where it stops. Masking runs from 0 to 100, with the same smooth ramp in Radiant Raw and Radiant Photo.
How it works
The photo turns grayscale, so you judge sharpening on brightness alone. Let go and your photo is back in color.
You see the mask itself: white will be sharpened, black is protected, gray is sharpened in part.
Drag Masking and it reads "Showing: Sharpening · Masking", so you always know which control the pixels under the glass answer to.
The Focus page gathers the Magnifier, focus points, the focus mask, Sharpening and Noise Reduction. Sharpening still sits in its usual place too, with the same values.
Spot Removal first, then Sharpening
In Radiant Photo, Spot Removal heals before sharpening, whatever Masking is set to. It happens on its own, with nothing to set.
Radiant Raw’s own sharpen filter
Key benefits

Straight lines, even corners, clean edges.

Read the light. Without looking away.
Brush over a spot. Radiant Photo picks the clean source.
Point at a Look. See it on your photo.

Design it once. Sign every output.
Done keeps your work. Export writes the files.
Every photo, understood. Right on your computer.
Every photo, scored. Every line, yours.
Many frames. One cover.
It suggests. You decide.
Every recipe. One panel.
One press for a good framing. Every other one in view.
Frame it your way, with good framings to choose from.
Straighten the lines. See every way first.
Smooth the grain. Keep the edges.
One workflow
Try it on a portrait or a bird: Masking keeps the background smooth while the eyes get crisp.


