
Clarity and Vignette
Effects adds or softens midtone texture with Clarity. Vignette darkens or lightens the edges of the photo to draw the eye in. Both panels sit near the end of the Edit page, before Detail.
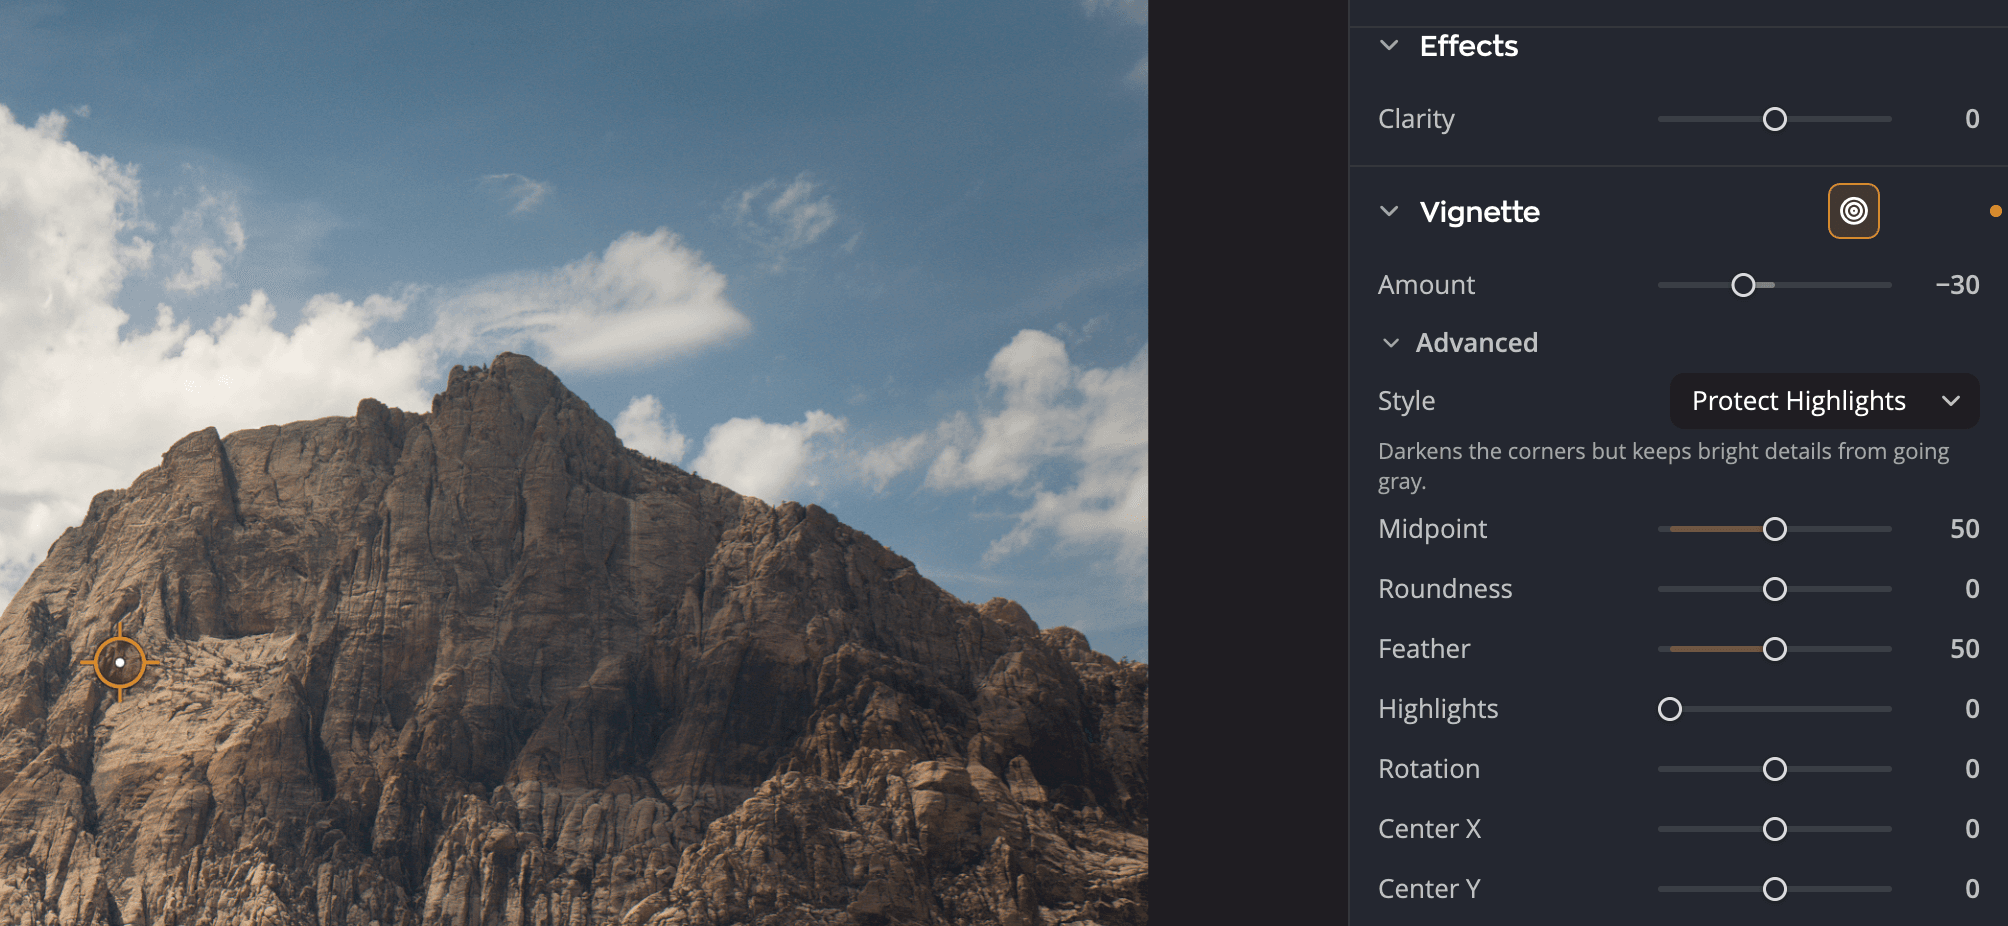
| # | Control | What it does |
|---|---|---|
| 1 | Clarity | Adds or removes local contrast in the midtones |
| 2 | Amount | How strongly the edges darken or lighten |
| 3 | Advanced | Style and the sliders that shape the vignette |
| 4 | Center target | Where the vignette is centered. The target button in the header shows or hides it. |
Clarity
| Slider | Range | What it does |
|---|---|---|
| Clarity | −100 to +100 (default 0) | Raise it for crisp texture and punch. Lower it to soften skin and haze. |
Clarity works on midtone contrast, so it adds depth without blowing highlights or crushing shadows. Go easy on portraits: high values make skin look rough.
Add a vignette
- Open the Vignette panel. The center target appears on the photo.
- Click where the vignette should be centered, or drag the target. If Amount is still 0, placing the target sets it to −35 so you can see what you're placing.
- Set Amount: negative values darken the edges, positive values lighten them.
- Click Advanced to shape the vignette.
- Click the target button in the panel's header when you're done. The target disappears and the panel stays open. Click it again to move the center later.
The Vignette controls
| Control | Range | What it does |
|---|---|---|
| Amount | −100 to +100 (default 0) | Darkens (negative) or lightens (positive) the edges |
| Style | See below | How the vignette treats the areas it covers |
| Midpoint | 0 to 100 (default 50) | How far in from the edges the vignette reaches |
| Roundness | −100 to +100 (default 0) | From a rectangle with rounded corners to a circle |
| Feather | 0 to 100 (default 50) | How softly the vignette fades into the photo |
| Highlights | 0 to 100 (default 0) | Keeps bright areas bright inside a dark vignette. Has no effect with Paint. |
| Rotation | −90° to +90° (default 0°) | Turns an oval vignette |
| Center X, Center Y | −50 to +50 (default 0) | Moves the center left or right, up or down. 0 is the middle of the photo. |
Choose a style
| Style | What it does |
|---|---|
| Protect Highlights (default) | Darkens the corners but keeps bright details from going gray |
| Preserve Color | Darkens the corners without shifting their color |
| Paint | Paints the corners with plain black or white. Highlights has no effect. |
Protect Highlights suits most photos. Use Preserve Color when a dark vignette makes the colors at the edges look muddy, and Paint for a graphic, solid edge.
Note
The Advanced rows stay open or folded as you left them, the next time you open Radiant Raw.
Compare and reset
- Click the eye in a panel's header to turn the panel off and on, and see what it does.
- Double-click a slider to reset it, or use the reset in the panel's header to reset the whole panel.
Tip
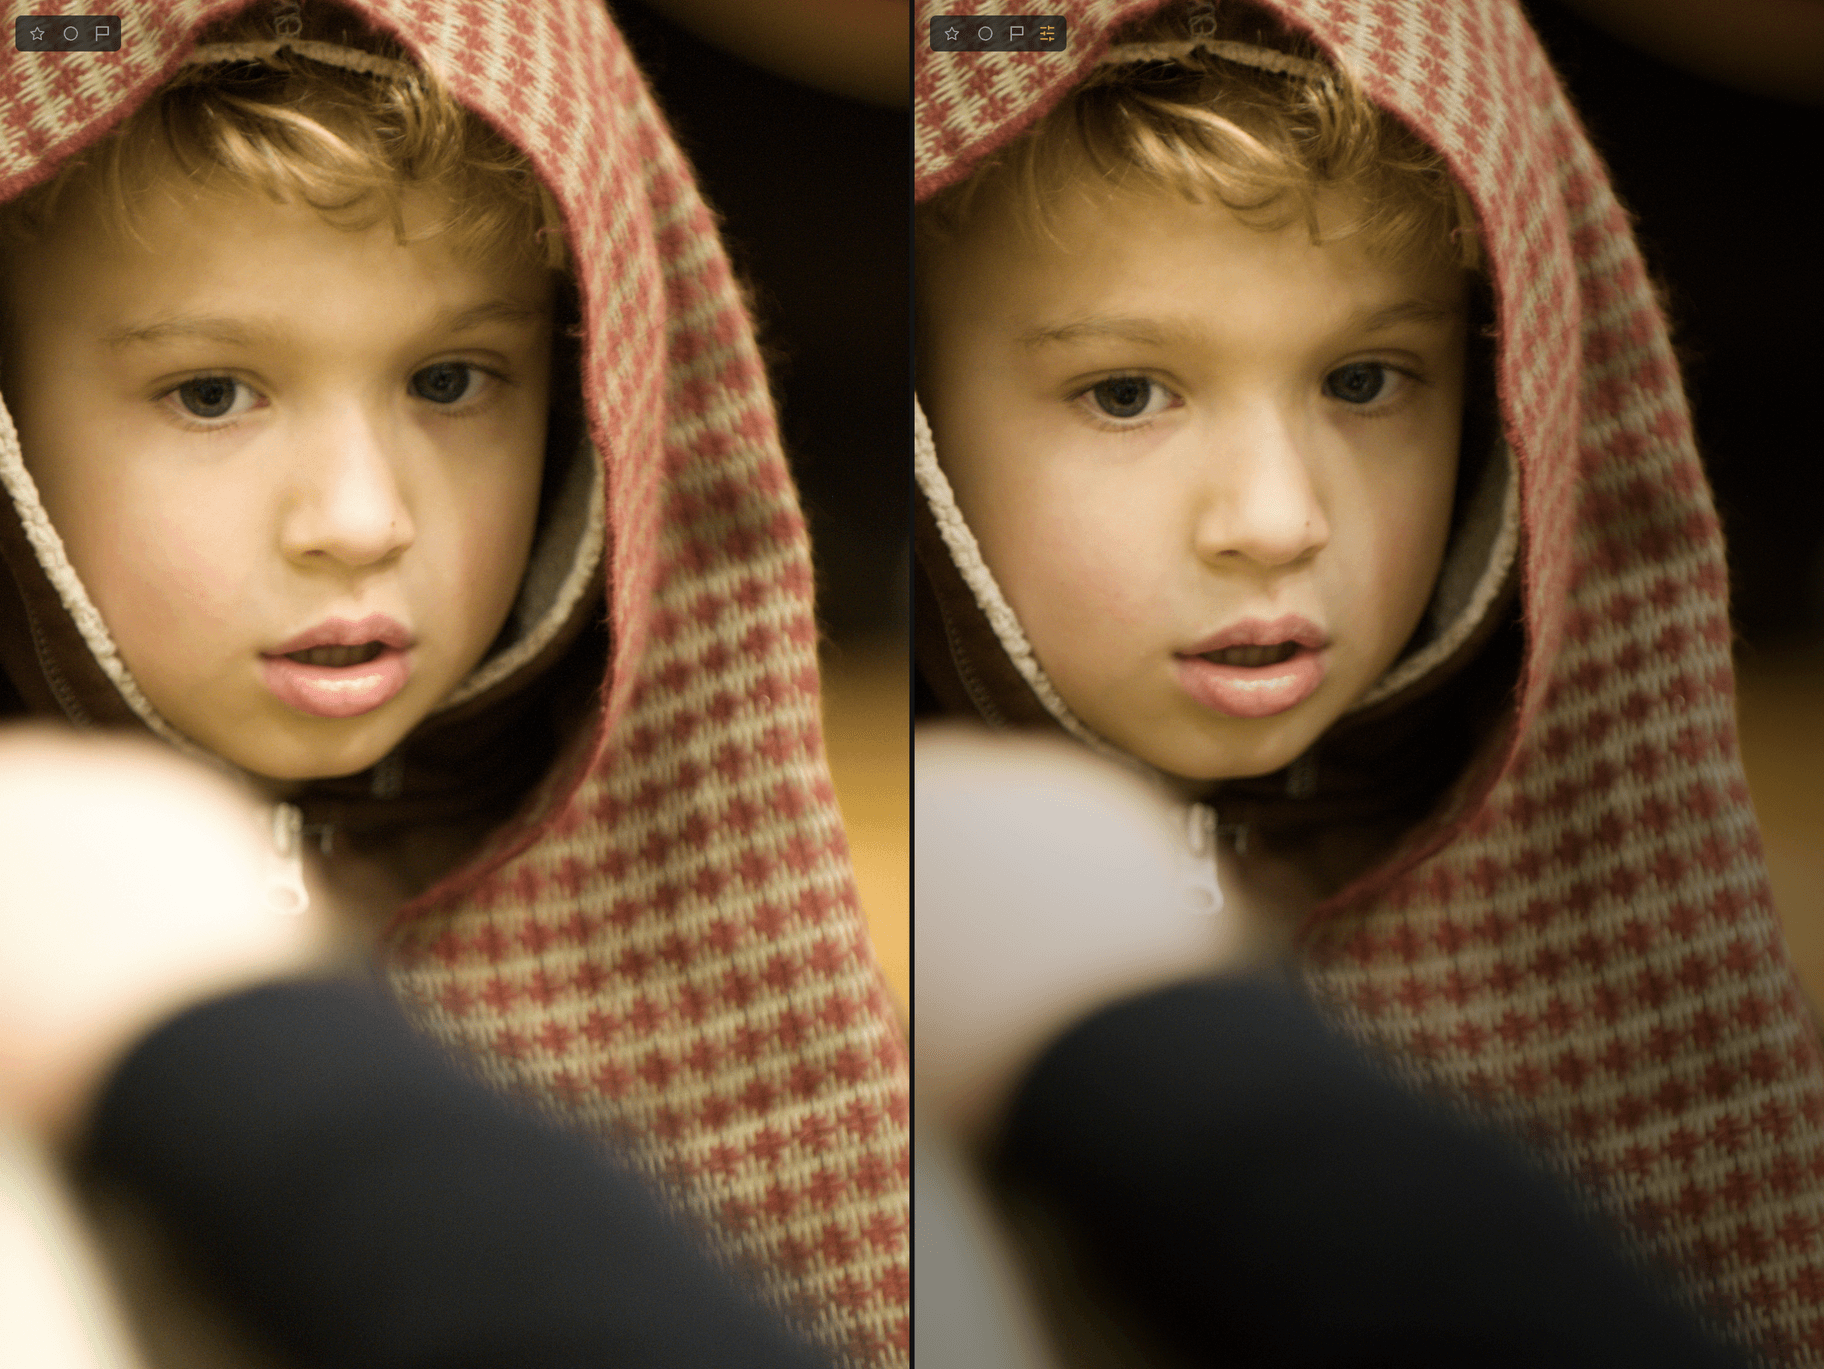
A vignette is easiest to judge against the original. Press ⌥3 (Alt+3 on Windows) for Split.
Learn more
- Sharpening and Noise Reduction
- Optics, for lens vignetting
- The Edit page