
Touring the develop window
The develop window is where you work. Your photo fills the middle, the tools sit on the right, and every open photo waits in the filmstrip at the bottom.
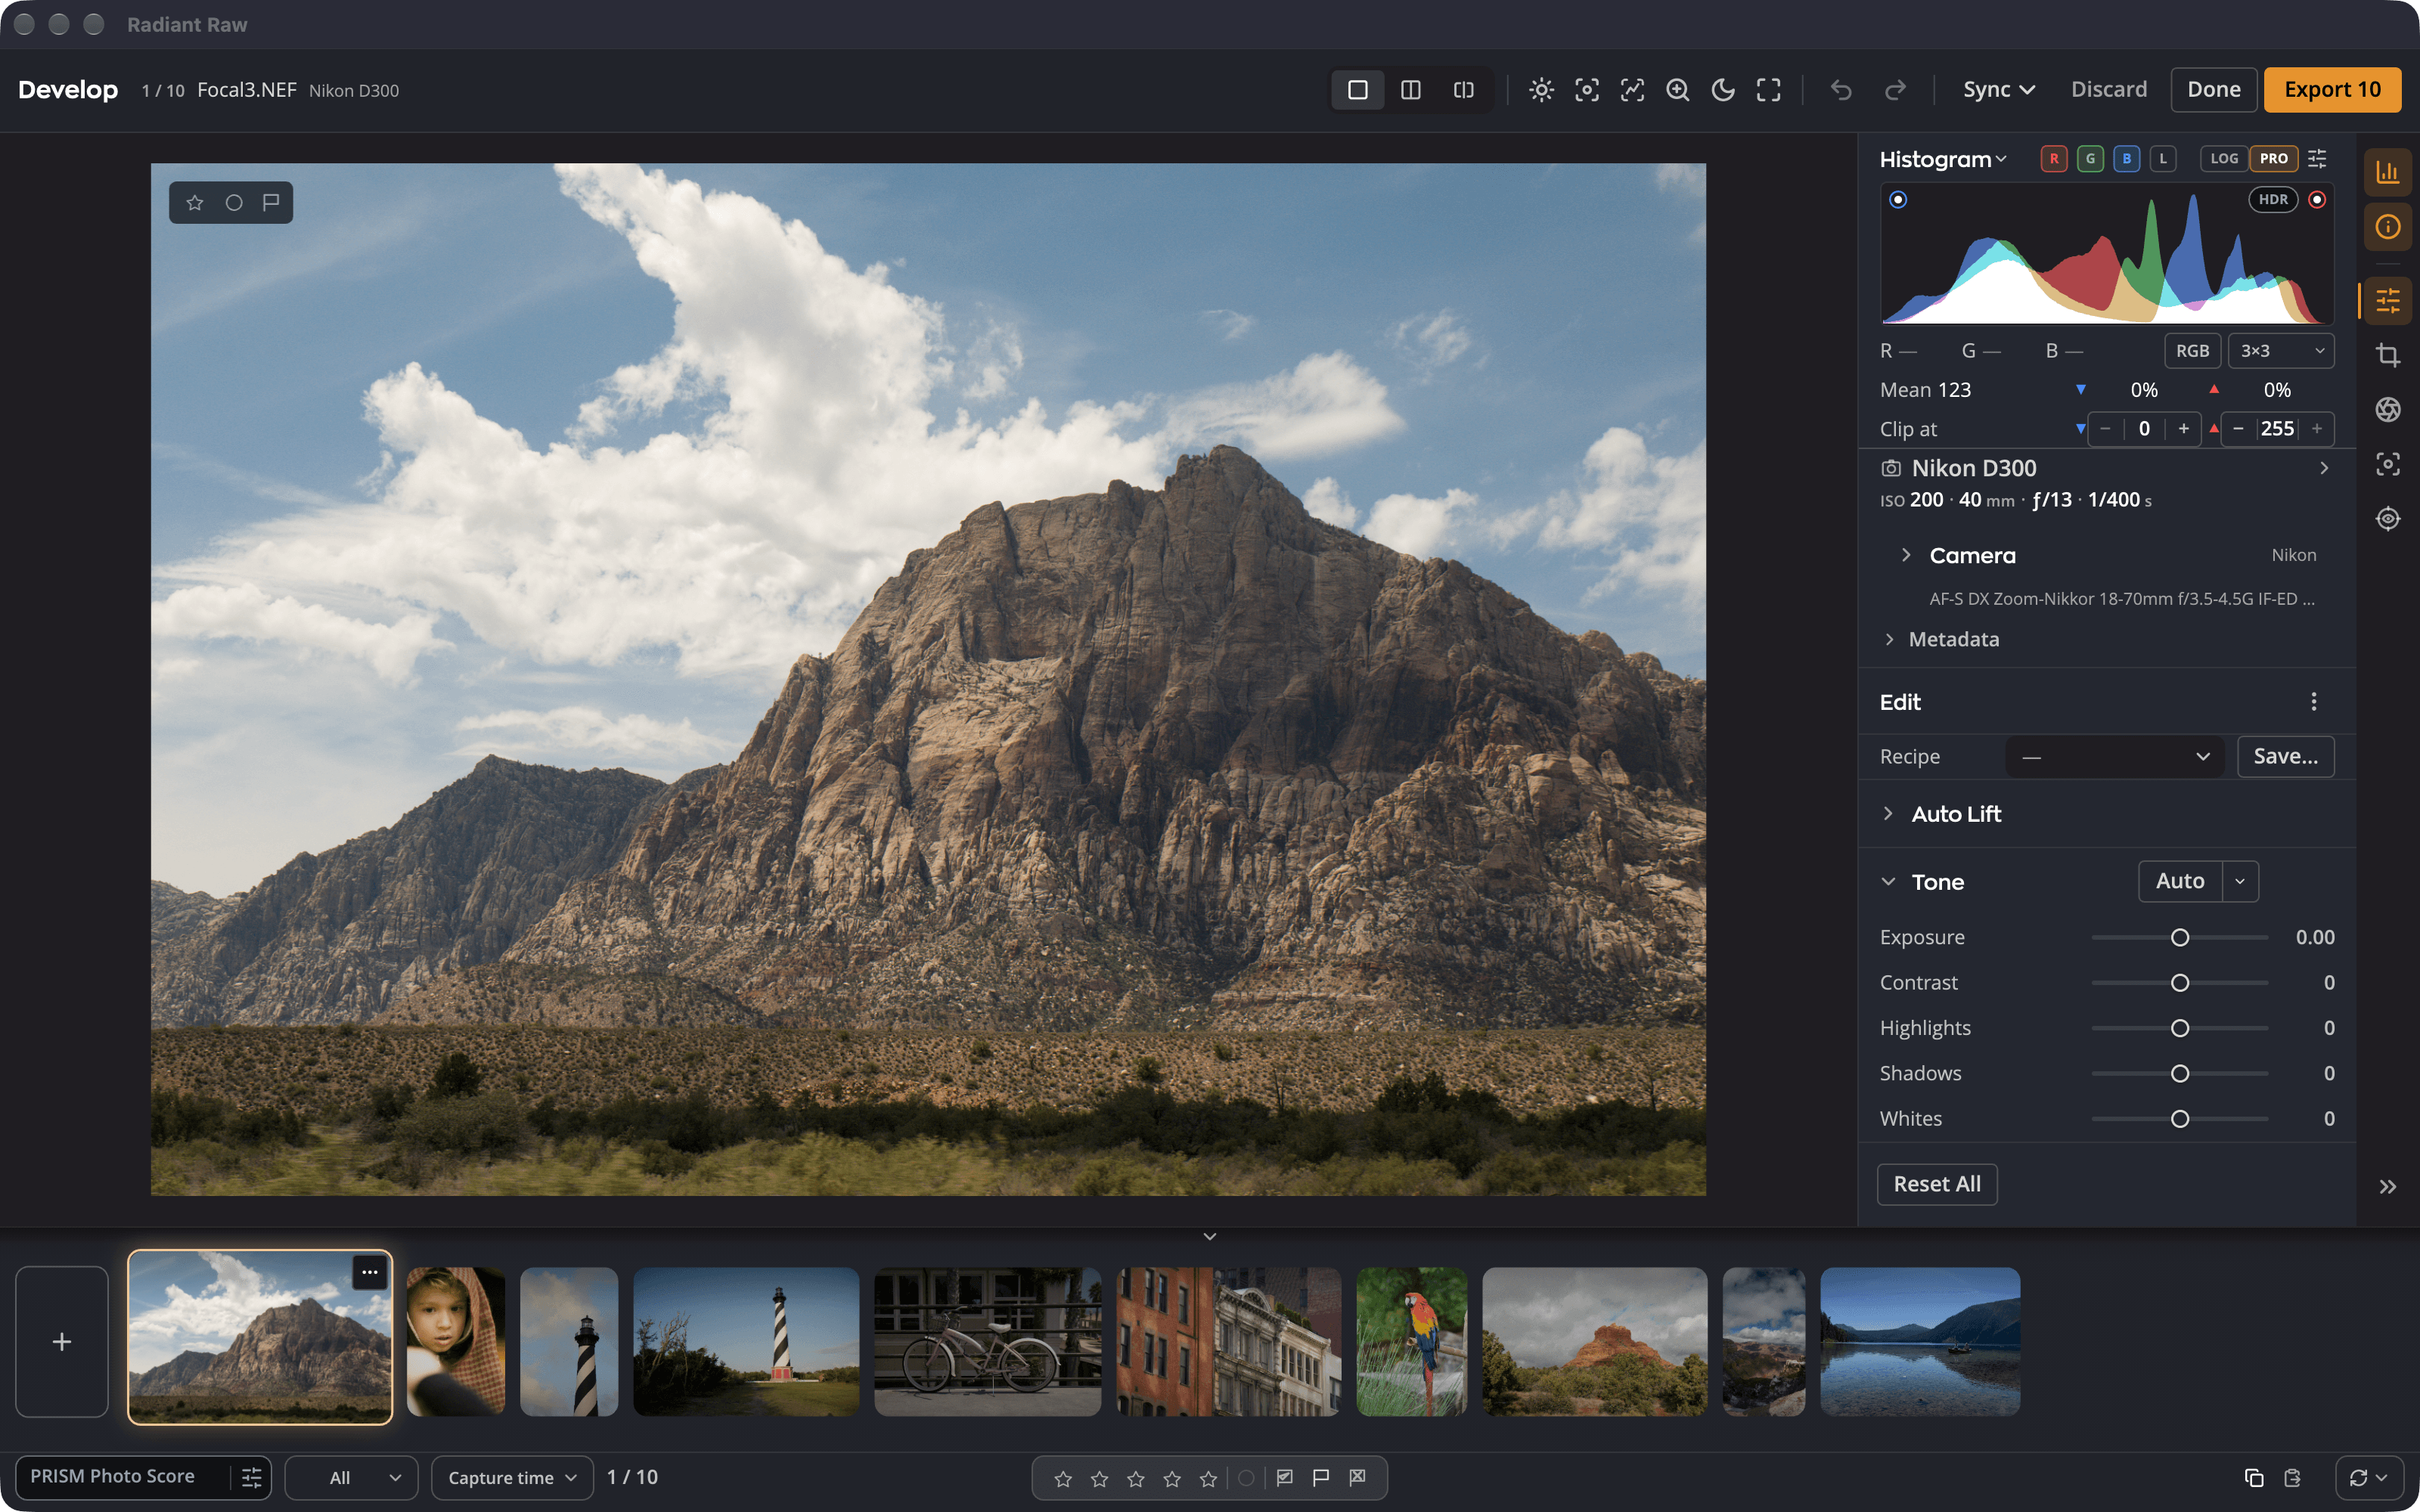
| # | Area | What's there |
|---|---|---|
| 1 | Title bar | The photo counter (for example, 3 of 12), file name and camera, Compare, View, Undo and Redo, then Sync, Discard, Done and Export |
| 2 | Canvas | Your photo, the zoom control (Fit, 100%) and the Camera readout |
| 3 | Right rail | Histogram and Info at the top, then seven pages: Edit, Crop & Straighten, Optics, Focus, Recipes, Red-eye and Spot Removal. With Automatic composite on, Raw Composite sits below Edit (Raw Composite) |
| 4 | Filmstrip | Every open photo, with Selects and Sort (which also holds Tile style), plus buttons to copy, paste and sync settings |
The seven pages
| Page | Use it to | Key |
|---|---|---|
| Edit | Develop tone, color and detail | ⌃⌘1 |
| Crop & Straighten | Crop, straighten, rotate and flip | ⌃⌘2 |
| Optics | Correct your lens and perspective | ⌃⌘3 |
| Focus | Check focus and sharpness | ⌃⌘4 |
| Recipes | Browse and apply recipes | ⇧⌘P (Ctrl+Shift+Q on Windows) |
| Red-eye | Fix red eyes | ⌃⌘5 |
| Spot Removal | Remove dust and spots | Q |
On Windows, use Ctrl+Shift with the same numbers.
When you zoom in
Past Fit, a small map of the whole photo appears just above the zoom control, with the part you're looking at outlined in your accent color. Point at it and it grows. Press or drag inside it to move around the photo. At Fit it goes away. It's also hidden in a compare view, at full Lights Out, and on a Mac while an HDR photo shows in HDR. A screen reader calls it Navigator, with the hint Drag to move the zoomed view.
Once the zoomed photo covers the Camera readout and the zoom control, they slide down to the canvas's bottom edge, and the map rides with them. They come back when you return to Fit. Zooming out part of the way leaves them at the edge. With Reduce motion on, on a Mac HDR photo, or when you move to another photo, they move at once. In a compare view, or with the scopes shown under the photo, they stay where they are.
Histogram and Info
Click Histogram to show the histogram above the pages. Choose a scope instead if you prefer: Waveform, Parade or Vectorscope.
With Pro histogram on, your color Samplers are listed under the histogram.
Click Info to see the camera settings, the photo's Metadata and its maker notes under Camera. Info takes the page's place while it's open, and a page turns it off again.
Make room for the photo
| To | Press |
|---|---|
| Hide the side panel | ⌥Tab (Ctrl+Tab on Windows) |
| Hide the panels and the filmstrip | ⇧⌥Tab (Ctrl+Shift+Tab on Windows) |
| Collapse the filmstrip | ⇧Space |
| Dim everything but the photo (Lights Out) | ⇧L |
| Full screen | ⌃⌘F (F11 on Windows) |
Tip
Press Z to fit the photo in the window, and ⌘1 (Ctrl+1 on Windows) to see it at 100%.