
The Edit page
The Edit page holds the develop panels, from overall tone down to fine detail. Most photos only need the first few. Work top to bottom, and stop when the photo looks right.
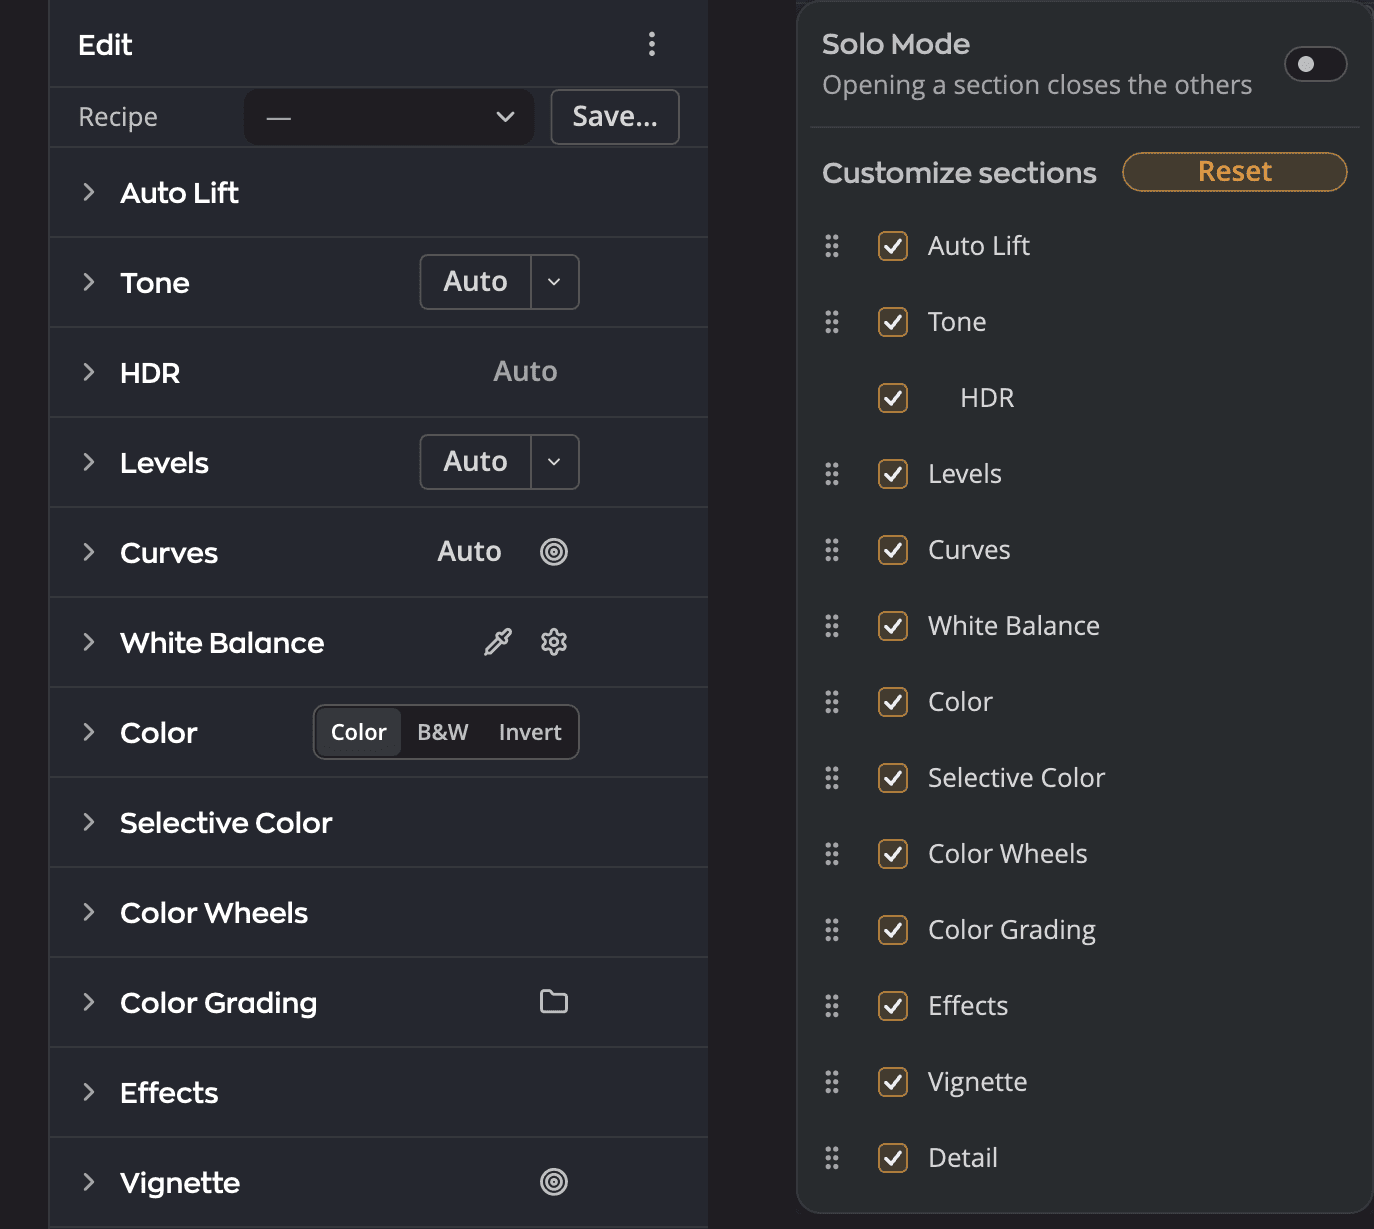
| # | Control | What it does |
|---|---|---|
| 1 | Recipe row | Shows which recipe the photo uses. Click Save… to save your settings as a new recipe. |
| 2 | Auto | Gives the panel an automatic starting point, here on Tone |
| 3 | Drag grip in Customize sections | Drag a panel by its grip to move it up or down the page |
The panels
| Panel | What it does |
|---|---|
| Auto Lift | Brightens darker tones in one move. Choose Gentle, Balanced or Strong, then set Amount. |
| Tone | Overall brightness and contrast, with an Auto starting point |
| HDR | Edits for HDR displays, with HDR Limit and Visualize HDR |
| Levels | Black, gray and white points per channel, with eyedroppers |
| Curves | Point and Parametric Curve adjustments, presets, and .acv import |
| White Balance | Temp and Tint, presets and an eyedropper |
| Color | Vibrance and Saturation, plus a black-and-white mode with its own mixer |
| Selective Color | Hue, saturation and luminance for six color bands, plus Split Color Warmth |
| Color Wheels | Color for shadows, midtones and highlights |
| Color Grading | Applies a Look or a lookup table, with Strength up to 200 |
| Effects | Clarity |
| Vignette | Darkens or lightens the edges, in three styles |
| Detail | Sharpening and noise reduction |
A photo with a Raw Composite takes its exports from the composite, not from these panels.
When you click Auto
Every Auto button says what it did in a message over the photo, for example Tone Auto: set by Enhanced Contrast and Brightness (Contrast only).
- Point at the message to read the details, such as the values Auto set or why it held back.
- Click Undo in the message to take the Auto back. It works while that Auto is still your last change to the photo.
- The message goes after 7 seconds. It stays while the pointer is over it, or while it has keyboard focus.
- When there was nothing to change, the message says so, for example Tone Auto: nothing to change. That's what you see when you click the same Auto twice. There is nothing to undo.
- When Auto can't measure the photo, it says so. If it changed nothing, the message says that too: White Balance Auto: couldn't measure the photo. Nothing changed.
- Screen readers read the message, then its details.
Each panel's Auto replaces only what an Auto set in that panel before. So Tone's Auto and Levels' Auto can stand together. The sliders an Auto doesn't set keep your own values.
Tone's Auto and Auto Exposure change the photo's brightness. So when a Levels Auto is already on the photo, it runs again with its own method on the new picture, in the same undo step. You get the same picture whichever Auto you click first. Auto Exposure also replaces the Auto that stands in Tone, from Tone's Auto or from Develop > Auto: what that Auto set goes back to its default, and only Exposure is set.
Develop > Auto (⌘U, Ctrl+U on Windows) applies the Automatic recipe to the photo and says what it set, with Undo. See Recipes.
While a panel still holds exactly what Auto set, its header shows a small Auto chip. Point at it to read This section still holds what Auto set. Change a value here to make it your own. Change a value in the panel, undo the Auto or reset the panel, and the chip goes. Auto Lift, Tone, Levels, Curves and White Balance show it.
Make the page your own
- Hide panels you never use, and drag the rest into the order you like.
- The Recipe row at the top shows which recipe the photo uses. Click Save… to save your settings as a new recipe. See Recipes.
Tip
Can't find a setting? Press ⌘, (Ctrl+, on Windows) to open Settings, then ⌘F (Ctrl+F on Windows) to search it.