
Quick start
From a card of raw files to finished photos in five steps. Each step links to the full topic.
1. Open your raw files
The first time you open Radiant Raw, choose New to Radiant Raw? for a free 30-day trial, or Already own Radiant Raw? if you have a keycode, and click Continue. Then enter your email address (and your keycode) and click Start Free Trial or Activate.
On the Home screen, click Open Raw Files or drag raw files onto the window. They open in the develop window, with every photo in the filmstrip. See Opening raw files.
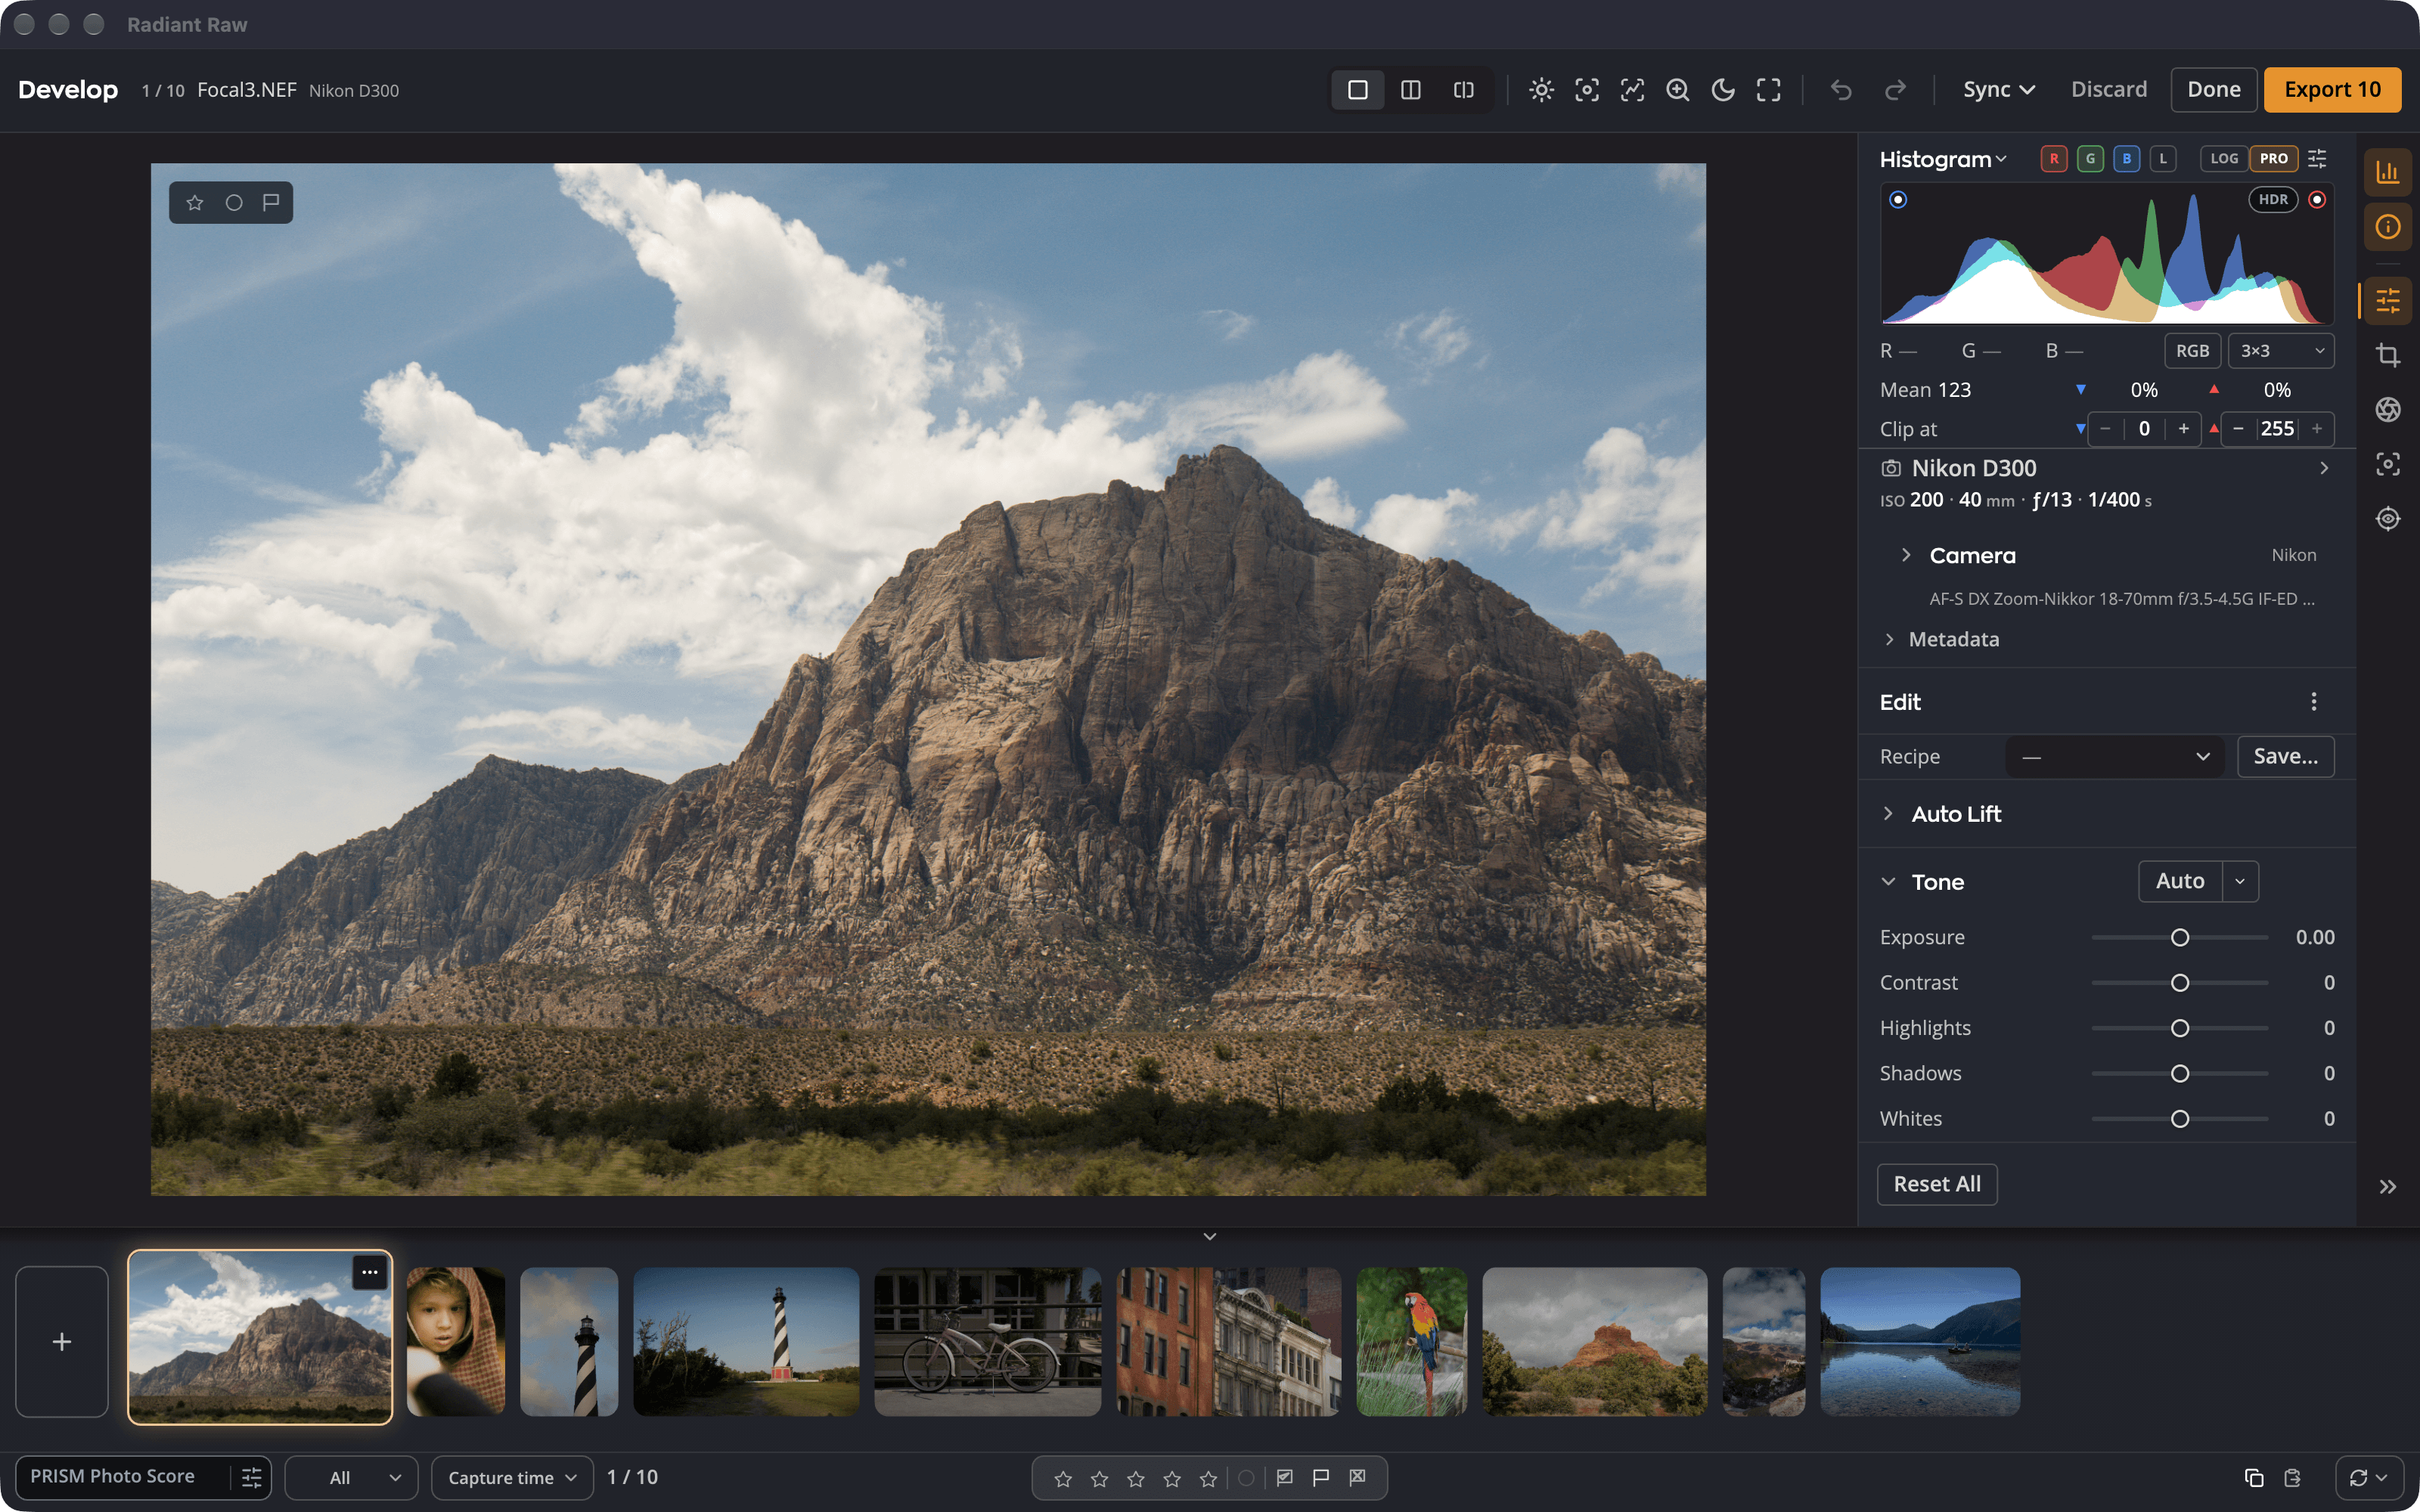
| # | Area |
|---|---|
| 1 | Title bar |
| 2 | Canvas |
| 3 | Right rail |
| 4 | Filmstrip |
2. Start with Auto
In the Tone panel, click Auto. At first it uses Enhanced Contrast and Brightness, which sets Exposure, Contrast, Highlights, Shadows, Whites and Blacks for this photo. A message over the photo says what it set. Click Undo in it if you don't like the result. For Exposure alone, click the ▾ beside Auto and choose Auto Exposure. It becomes Auto's default. Then adjust any slider from there. See Tone.
3. Set the white balance
In White Balance, pick the light the photo was taken in, or use the eyedropper on something that should be gray. See White Balance.
4. Crop and straighten
Press C to open Crop & Straighten, drag the frame, and press Return. See Crop & Straighten.
Tip
Happy with one photo? Copy its settings to the rest of the shoot with Sync in the title bar. See Copying and syncing settings.
5. Export, then carry on in Radiant Photo
Click Export (⌘E, Ctrl+E on Windows) to make finished files. With Radiant Photo installed and activated (a trial counts too), you can then choose Develop > Edit in Radiant Photo to finish them there. Done keeps your settings beside each photo without exporting. See Done, Export and Edit in Radiant Photo.