
The Focus page
The Focus page helps you check focus and sharpness before you sharpen. Click Focus on the right rail, or press ⌃⌘4 (Ctrl+Shift+4 on Windows).
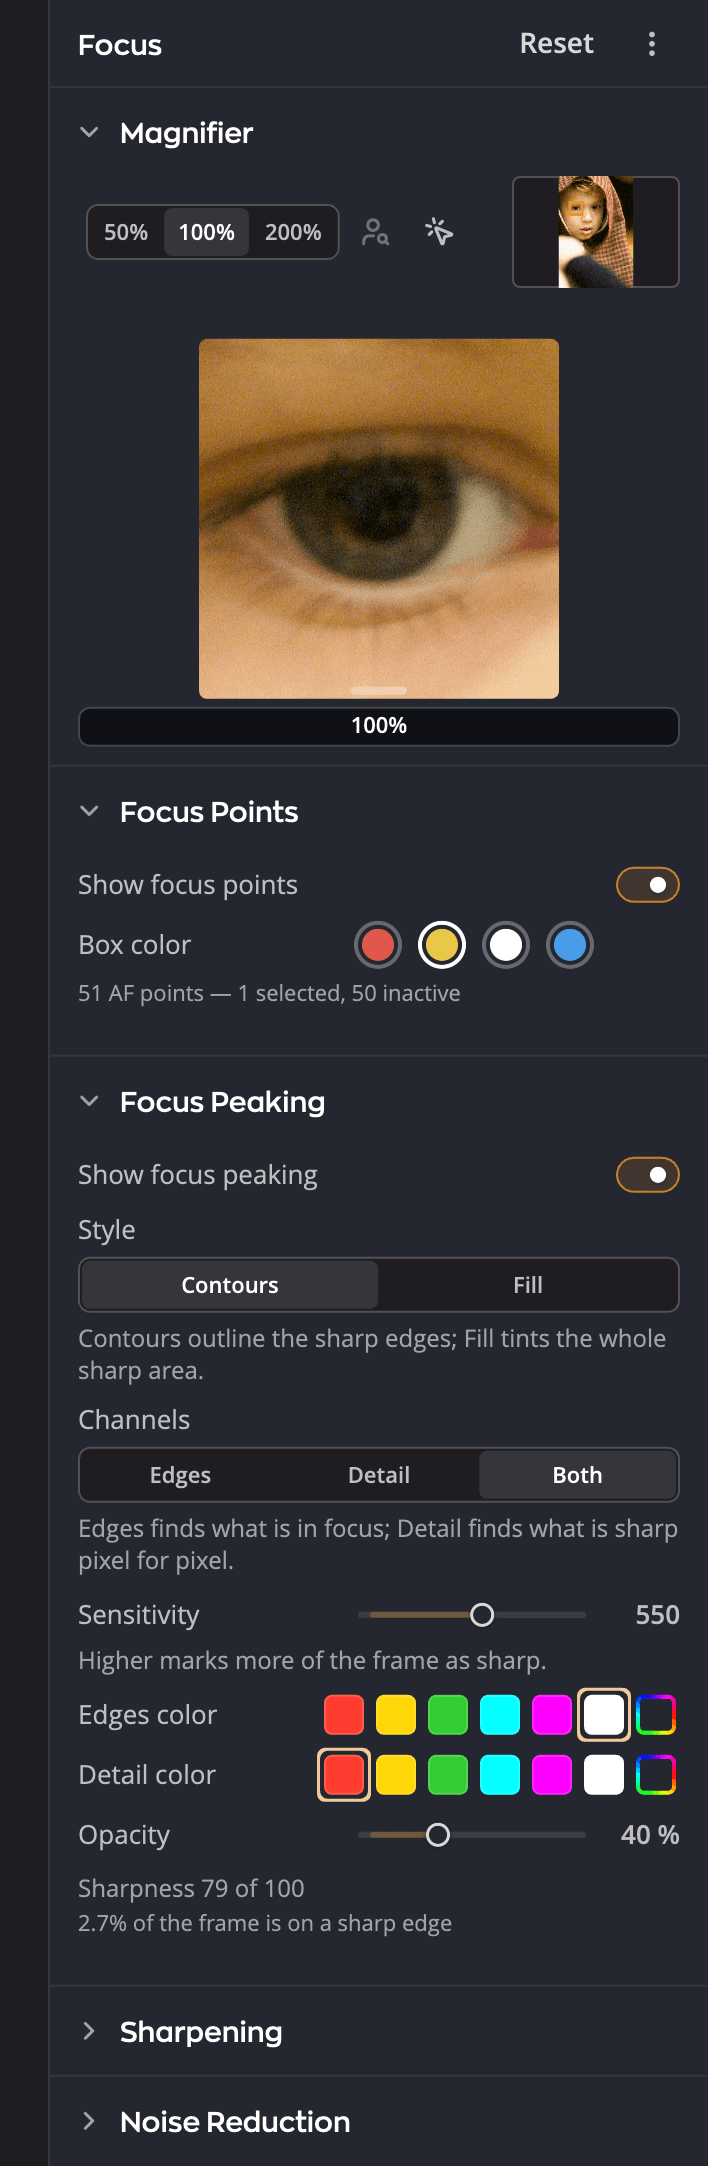
| # | Section | What it does |
|---|---|---|
| 1 | Magnifier | A close-up of one spot of the photo, at 50, 100 or 200% |
| 2 | Focus Points | Shows the autofocus points your camera used |
| 3 | Focus Peaking | Tints the parts of the photo that are sharp |
| 4 | Sharpening | The same sharpening controls as the Detail panel |
| 5 | Noise Reduction | The same noise reduction controls as the Detail panel |
The page opens on the Magnifier. Click a section's header to open it.
Magnifier
- Choose 50%, 100% or 200%. At 100%, one pixel of the photo fills one pixel of your screen.
- Drag the rectangle on the small thumbnail to aim, or select it and press the arrow keys.
- Click Zoom to Each Face to jump to a face. Click again for the next one.
- Click Click to Set Focus, then click the photo to aim the Magnifier there. Press Esc to cancel.
The line under the buttons says which control you're adjusting, so you can watch its effect up close. While Radiant Raw is still loading the full-quality pixels, the percentage under the glass ends in an ellipsis, for example 100%….
Zoom to Each Face steps through the photo's faces from left to right, as Radiant Flow finds them. On a photo Radiant Flow has scored, these are the faces in its score. For a photo it hasn't scored, or that changed since, Radiant Raw asks Radiant Flow to find the faces, once per photo while Radiant Raw is open.
While Radiant Flow looks, the button's tooltip reads Finding faces…. If no face is found, the button is dimmed and its tooltip reads Zoom to Each Face (no faces on this photo).
Note
Asking for faces needs Radiant Flow on this computer and PRISM Photo Score turned on in Settings > General. If either is missing, a photo Radiant Flow hasn't scored shows no faces.
The floating Magnifier
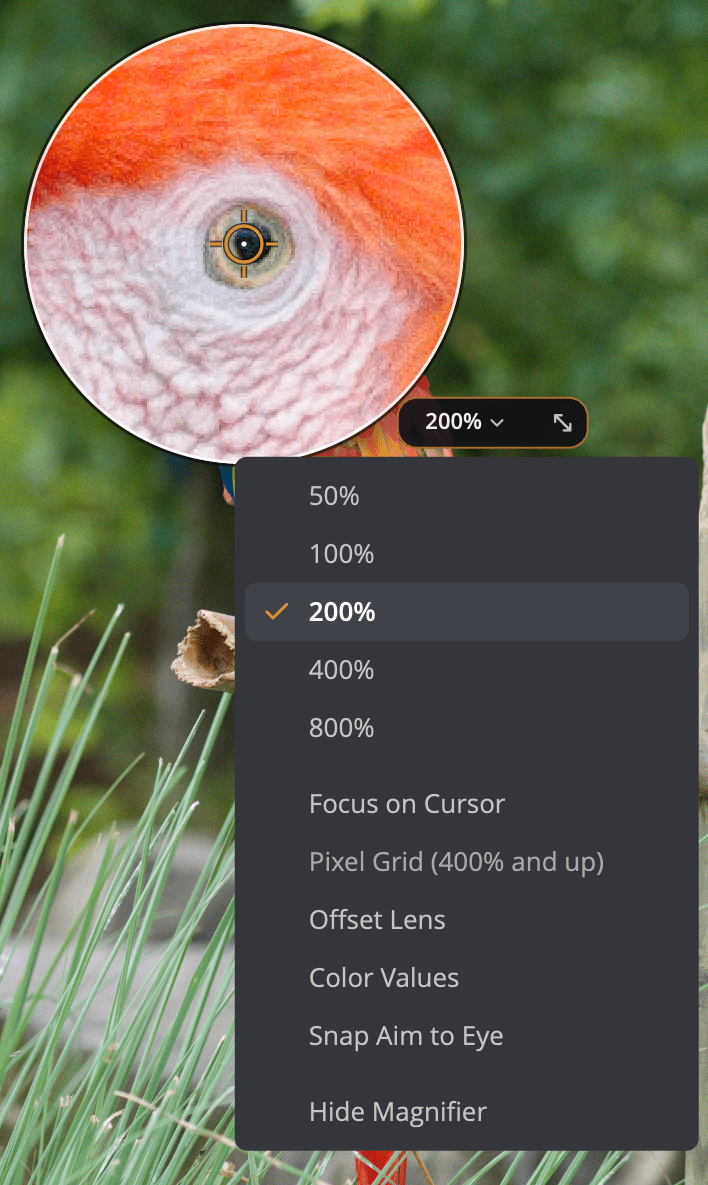
Press ` (the key left of 1, ^ on a German keyboard), or choose View > Magnifier, for a lens you can move over
the photo. On a Mac, the menu shows that key as your keyboard types it. The lens aims at the same spot as the page's
Magnifier, so moving one moves the other.
The lens grows out of the point it aims at, and folds back into that point when you put it away. A change of magnification or of the lens's size moves smoothly. With Reduce motion on, or on an HDR photo on a Mac, the lens appears and goes at once.
| To | Press |
|---|---|
| Show or hide the lens | ` (the key left of 1) |
| Switch between a fixed lens and one that follows the cursor | ⌥P (Alt+P on Windows) |
| Zoom in or out | ⌥= or ⌥− |
| Make the lens larger or smaller | ⌥] or ⌥[ |
| Aim at an eye | ⇧E |
On a photo Radiant Flow has scored, ⇧E uses the eyes PRISM found: the first press takes the eye nearest the lens, and each press after that moves to the next face. On a photo that isn't scored, it uses the eye your camera's focus data marks, or else the camera's focus point.
Drag the lens's edge to resize it. Click the lens's percentage to open its menu, which offers Magnification, Focus on Cursor, Pixel Grid (at 400% and up), Offset Lens, Color Values and Snap Aim to Eye. Offset Lens keeps a ring on the point you aim at and moves the glass beside it, so the glass doesn't cover that point. It has no effect with Focus on Cursor.
Focus Points
Turn on Show focus points, or press ⌥J (Alt+J on Windows), to draw the camera's autofocus boxes on the photo. The section says how many points the camera used. Choose a Box color: Red, Yellow, White or Blue.
Focus points follow your crop, and they're hidden in Before / After. Some cameras' focus data isn't read yet, and the section says so. For a DNG converted from a Fujifilm RAF file, open the original RAF to see focus points.
Did the camera focus on the eye?
On a photo Radiant Flow has scored, focus points also mark the eye that PRISM found. A small ring sits on the nearer eye of the face your camera's focus point overlaps most. If the focus point is on no face, the ring goes on the first face of the face row: a face with closed eyes if there is one, else the largest face. See Check every face.
- A solid green ring: the camera's focus point was on the eye.
- A broken orange ring with a dashed line back to the focus point: it wasn't. Under the section's status line, the page says AF missed the eye. Hold the pointer over it for what to do: The camera’s AF point sits away from the eye Radiant found. Check the eye at 100%.
The ring tells you where the camera focused, not how sharp the photo is. There's no ring when the photo has no AF data, or when it isn't scored or has no face.
To check every face's eyes at once, use the face row: see Check every face.
Focus Peaking
Turn on Show focus peaking, or press ⇧J, to tint the sharp edges in the photo. The section shows how much of the frame is on a sharp edge. It also scores the photo's sharpest detail from 0 to 100, for example Sharpness 82 of 100. The score describes the photo, so the sliders don't change it.
| Control | Range or choices | What it does |
|---|---|---|
| Sensitivity | 0 to 1000 (default 550) | Higher marks more of the frame as sharp |
| Color | Red, Yellow, Green, Cyan, Magenta, White (default), Custom color… | The tint |
| Opacity | 10 to 100% (default 40%) | How strong the tint is |
| Style | Contours or Fill | Outline the sharp edges, or tint the whole sharp area |
| Channels | Edges, Detail or Both | Edges finds what is in focus; Detail finds what is sharp pixel for pixel |
With Both, set an Edges color and a Detail color. Press ⌥⌘J (Ctrl+Shift+J on Windows) to step through the channels: off, Edges, Detail, Both, and off again.
Focus peaking is measured on the developed photo, so your develop settings change what it shows.
Sharpening and Noise Reduction
These two sections are the same controls as the Detail panel on the Edit page. A change in one place shows in the other. Here you can set them while you watch the Magnifier at 100%.