
Color and black and white
The Color panel sets how colorful your photo is, and turns it into black and white or a negative. A switch in its header chooses the mode.
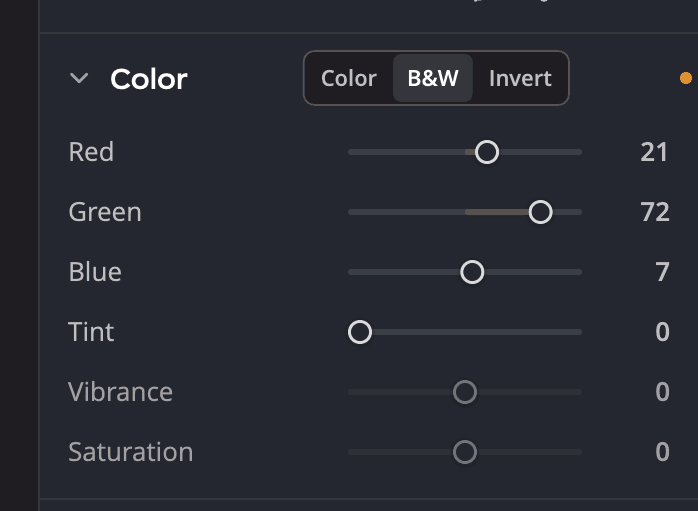
| # | Control | What it does |
|---|---|---|
| 1 | Color / B&W / Invert | The photo's mode |
| 2 | Red, Green, Blue, Tint | The black and white mix. Shown in B&W mode only. |
| 3 | Vibrance, Saturation | How colorful the photo is |
Make the photo more or less colorful
| Slider | Range | What it does |
|---|---|---|
| Vibrance | −100 to +100 (default 0) | Boosts muted colors more than strong ones, so skin and bright colors stay natural |
| Saturation | −100 to +100 (default 0) | Changes every color by the same amount |
Start with Vibrance: it's the gentler of the two. Use Saturation for a stronger change. At −100, Saturation removes all color, but B&W mode gives you far more control.
Double-click a slider to reset it.
Tone's Auto can set Vibrance and Saturation for you. Choose Contrast and Color in the ▾ beside it. With the default, Contrast only, Tone's Auto leaves this panel as it is.
Make a black and white photo
- Click B&W in the Color panel's header.
- Use the mix sliders to choose how each color turns into gray. Raise a slider to make that color lighter in the black and white photo, and lower it to make it darker.
- Add Tint to color the black and white result.
| Slider | Range | What it does |
|---|---|---|
| Red | −100 to +100 (default 21) | How light reds and skin become |
| Green | −100 to +100 (default 72) | How light greens and foliage become |
| Blue | −100 to +100 (default 7) | How light blues and skies become |
| Tint | 0 to 150 (default 0) | Adds a color tint to the black and white photo |
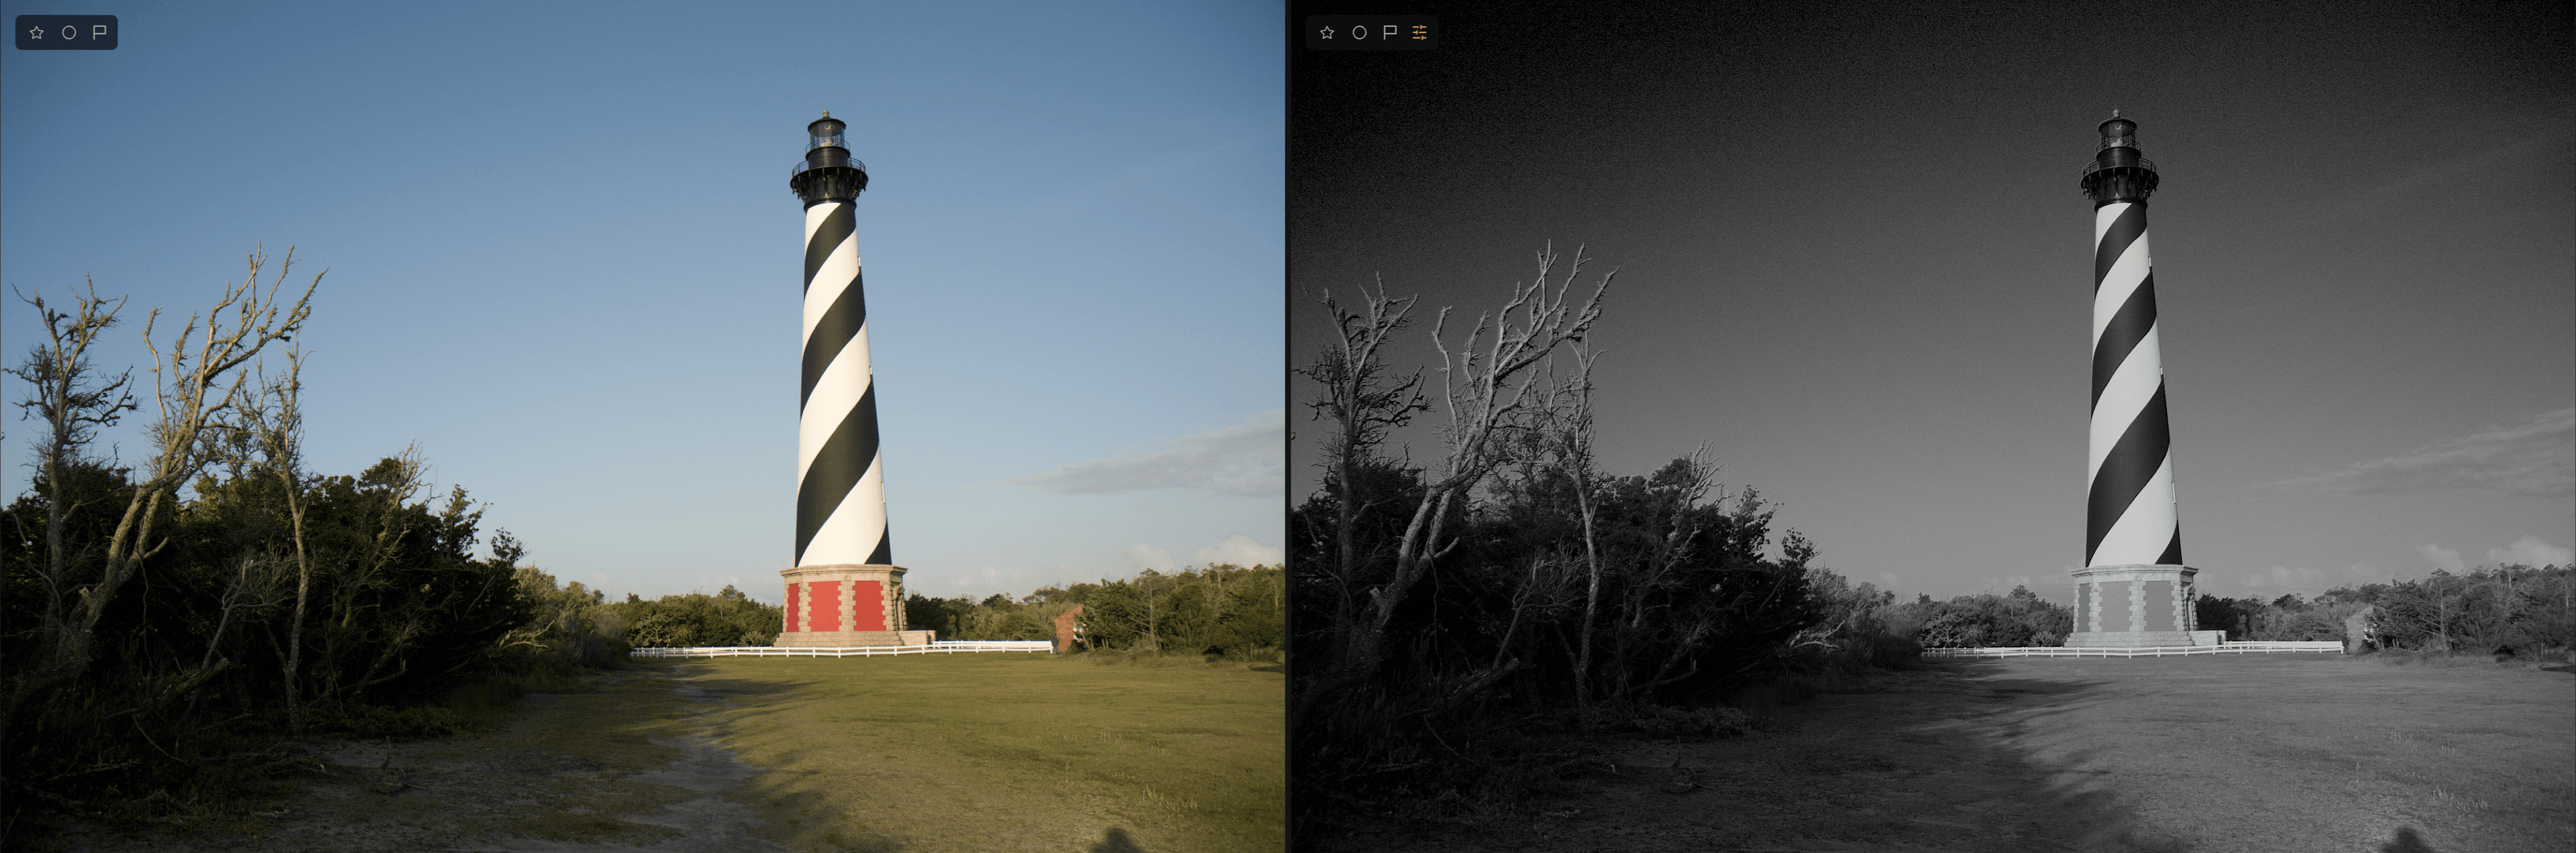
The defaults give a natural gray conversion. For a dramatic sky, lower Blue and raise Red: blue sky goes dark while clouds stay white.
Tip
The built-in recipes B&W, B&W Flat and B&W Noir are ready-made starting points. They carry the Lab Tools label, because they are still being refined. See Recipes.
Make a negative
Click Invert to turn the photo into its negative.
What changes in B&W and Invert
- Selective Color and Color Grading pause. Their panels dim, and their settings are kept for when you switch back to Color.
- Color Wheels keep working, so you can tint the shadows, midtones and highlights of a black and white photo.
- The B&W mix keeps its values when you switch modes, so going back and forth loses nothing.
Only one mode is on at a time.
Reset and compare
To put Vibrance and Saturation back, use the reset in the panel's header. It leaves the mode and the B&W mix as they are: to leave B&W or Invert, click Color. To judge a black and white conversion against the original, press ⌥2 (Alt+2 on Windows) for Before / After, or ⌥3 for Split. See Comparing before and after.