
Sharpening and Noise Reduction
The Detail panel sharpens your photo and removes noise. Judge both at 100%: press ⌘1 (Ctrl+1 on Windows) before you start.
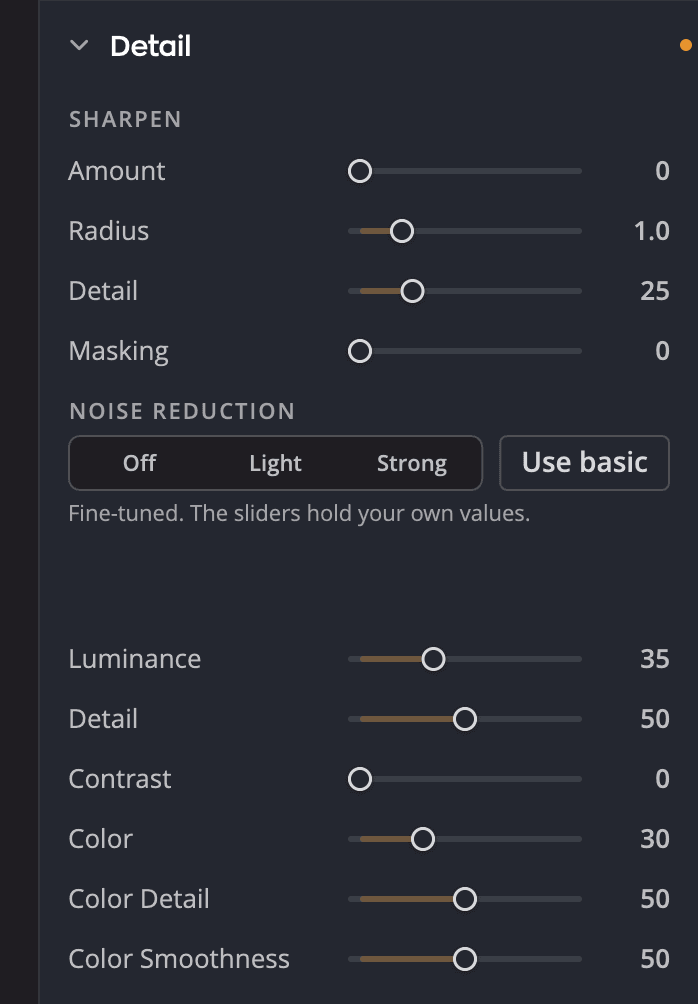
| # | Control | What it does |
|---|---|---|
| 1 | Off, Light, Strong | Sets how strongly noise is reduced, or turns noise reduction off |
| 2 | Noise Reduction sliders | Fine-tunes noise reduction. Once you move one, the sliders hold your own values. |
| 3 | Use basic | Goes back to the simple choices |
Sharpen
| Slider | Range | What it does |
|---|---|---|
| Amount | 0 to 100 (default 0) | How strongly edges are sharpened |
| Radius | 0.5 to 3.0 (default 1.0) | How wide the sharpening reaches around each edge. Keep it low for fine detail. |
| Detail | 0 to 100 (default 25) | How much strong edges are sharpened. Keep it low to sharpen fine texture and hold back halos on strong edges. Raise it to sharpen edges almost as much as texture. |
| Masking | 0 to 100 (default 0) | Limits sharpening to edges. Raise it to keep skin and skies smooth. |
Tip
The Focus page shows the same sharpening controls next to the Magnifier at 1:1, which makes them easier to judge.
Noise Reduction
Start simple: choose Light or Strong. The sliders below move to show what that strength means. Choose Off to turn noise reduction off.
To fine-tune, move any slider. From then on the sliders hold your own values. Click Use basic to go back to the simple choices.
| Slider | Range | What it does |
|---|---|---|
| Luminance | 0 to 100 (default 0) | Removes grain in brightness |
| Detail | 0 to 100 (default 50) | Protects fine detail from luminance noise reduction |
| Contrast | 0 to 100 (default 0) | Keeps contrast in smoothed areas |
| Color | 0 to 100 (default 0) | Removes color speckles |
| Color Detail | 0 to 100 (default 50) | Protects fine color detail from color noise reduction |
| Color Smoothness | 0 to 100 (default 50) | How far color noise reduction blends colors across an area |