
An overview of the editing tools
Radiant Photo's editing tools live on the Adjustments page of the right panel, one section per tool. This topic lists them in the order they appear and shows the controls every section shares.
Every edit stays editable
Every adjustment is live. You can go back to any slider at any time, in any order, and nothing is baked in until you save a new file. Your original photo is never changed.
The tools, in order
Start with Smart Editing, then use the individual tools for anything still missing. The letter in the last column opens or closes that section.
| Group | Section | What it's for | Key |
|---|---|---|---|
| Smart Editing | Smart Editing | Three target-based sliders for the whole photo | |
| Develop | Tone | Exposure, contrast, depth and the black and white points | T |
| Levels | Black, gray and white input levels per channel | ||
| Curves | Point and parametric tone curves | ||
| Presence | Texture, clarity, atmosphere, vibrancy and saturation | ||
| Color | Color contrast, fidelity, tint, skies and foliage | K | |
| Skin Tone | Natural skin tones and color cast removal | Y | |
| Details | Sharpening and Noise Reduction | D | |
| Portrait | Face Selection | The faces Radiant Photo found | A |
| Eyes | Eye enhancement, dark circles and catchlights | E | |
| Face | Contouring, teeth, lips and face light | F | |
| Skin | Smoothing, blemishes and shine | S | |
| Makeup | Skin toning and blush | M | |
| Color grading | Color Grading | Looks, with Strength, Look Contrast and Look Saturation | L |
| Color Wheels | Separate color for shadows, midtones and highlights | ||
| Targeted | Selective Color | Hue, saturation and luminance by color band | H |
| Black & White | Black-and-white conversion by color band | B | |
| Graduated Filter | Adjustments inside or outside a radial or linear area | G | |
| Finishing | Finishing Tools | Temperature, tint, exposure and contrast at the end | V |
| Effects | Vignette and film grain |
The sections you see depend on the active Workspace. The default, Professional, shows every tool in this table. See Using Workspaces to show only the tools you use.
Controls every section shares
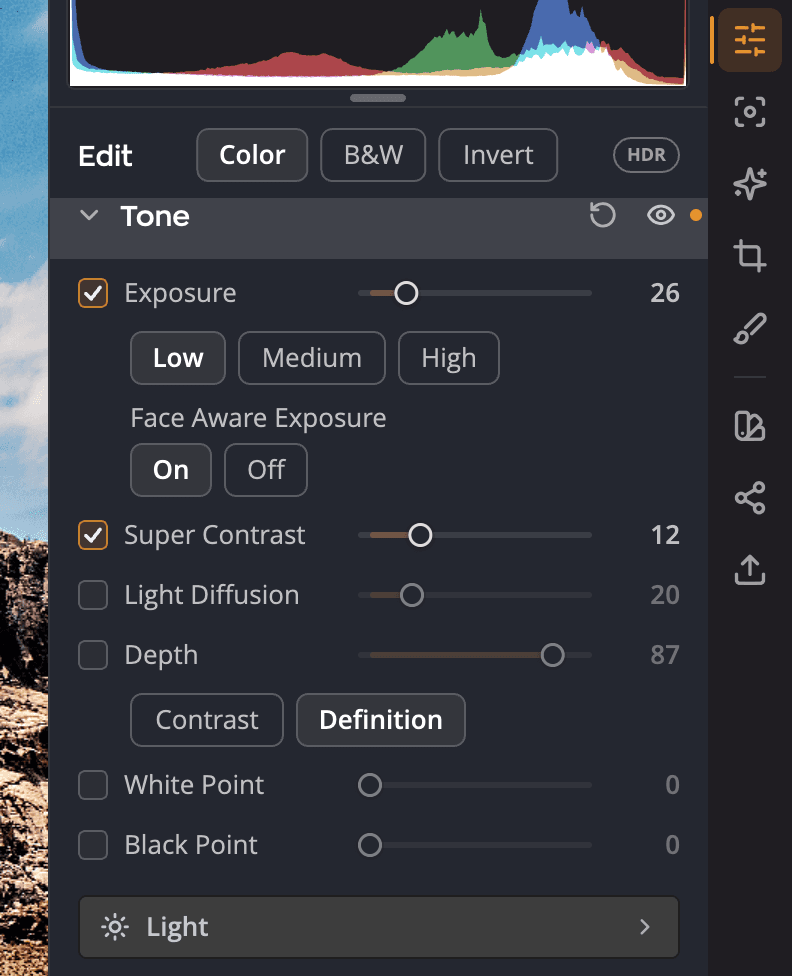
The examples use the Tone section; every section works the same way. Callouts 5 and 6 are explained in the next two sections.
| # | Control | What it does |
|---|---|---|
| 1 | Section title | Click to open or close the section. |
| 2 | On/off eye | Turns the whole tool off or on (Disable Tone, Enable Tone) and keeps its settings. Useful for a quick comparison. |
| 3 | Reset | Returns the section to its defaults (Reset Tone). Point at the header to see it, or hold Option (Alt on Windows) and click the title. |
| 4 | Edited dot | Shows that the tool is changing the photo. |
| Right-click the header | Hides the tool from this Workspace (Hide Tone), or opens Manage Workspaces…. |
Smart Editing and Face Selection have no eye. Double-click any slider to return it to its default.
Solo mode is on by default, so opening one section closes the others. To turn it off, right-click Adjustments in the rail, or use Settings > General.
Tip
Right-click Adjustments in the rail and choose Show active tools only to see just the tools you've used on this photo.
Color, B&W or Invert
The Edit header (5) above the tools sets how the whole photo renders:
| Mode | What it does |
|---|---|
| Color | The normal, full-color photo. |
| B&W | A black-and-white conversion. Fine-tune it in Black & White. |
| Invert | A negative of the photo. |
The other pages
The rail (6) on the right edge of the window holds more pages besides Adjustments:
| Page | What it's for |
|---|---|
| Focus | Checking sharpness with the Magnifier, focus points and the focus mask. See The Focus page. |
| Crop & Straighten | Cropping, rotating and straightening. See Crop & Straighten. |
| Spot Removal | Healing and cloning away spots. See Spot Removal. |
Recipes aren't a page in the rail: they have a Recipes tab in the left panel. See Recipes.