
DNG files
DNG (Digital Negative) is an open raw format. Radiant Photo opens DNG files and can save your finished edit as a DNG. It can also turn your camera raw files into Linear DNG files with Adobe's free DNG Converter.
Open a DNG
Radiant Photo treats a DNG like any other camera raw file. What happens when it opens depends on your choice in Settings > Raw, under When opening a Raw. See Raw files and Radiant Raw.
Convert a raw file to Linear DNG
File > Convert Raw to Linear DNG… makes a Linear DNG from the camera raw file on screen. It runs Adobe's free DNG Converter, which writes a DNG that opens correctly in Lightroom Classic and other raw editors.
- Open a camera raw file.
- Choose File > Convert Raw to Linear DNG…, or click the same row on the Share page.
- Choose where to save the DNG. The dialog starts in the raw file's folder.
When it finishes, Linear DNG created confirms the file name.
The DNG holds your original raw file, so it keeps all of its editing latitude. Your Radiant Photo edit, your watermark and any metadata changes are not part of it. The Share page says so under the row: Original raw · no Radiant Photo edit · no watermark · metadata untouched.
Note
The command works only on camera raw files. For any other photo, Radiant Photo says Only camera raws convert to DNG. To deliver an edit without losing quality, save a 16-bit TIFF instead.
Install the Adobe DNG Converter
Radiant Photo doesn't include the converter. If it isn't installed, the command shows Adobe DNG Converter required, with Get the free download.
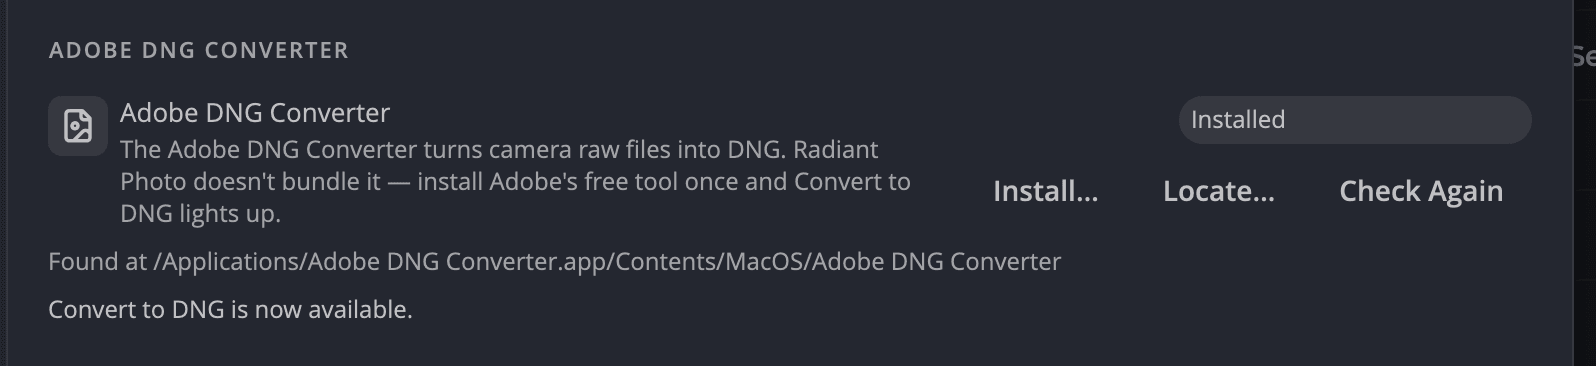
You can also install it from Settings > Sidecars, under Adobe DNG Converter:
- On a Mac, click Install DNG Converter. Radiant Photo installs it with Homebrew. If Homebrew isn't on your Mac, copy the command shown to run it yourself, or get Adobe's free download.
- On Windows, download the Adobe DNG Converter installer, run it, then click Check Again.
Once the converter is installed, the card says so and offers Locate… to point at another copy and Check Again to look for it again.
If the converter is installed somewhere unusual, point the card at it. On Windows, pick
Adobe DNG Converter.exe itself. When the converter is found, the card says Convert to DNG is now available.
Save your edit as a DNG
The Save dialog and Batch Export can also save your finished edit as a DNG. This file is your edited photo, a 16-bit render wrapped as a Linear DNG, so other apps see your Radiant Photo result.
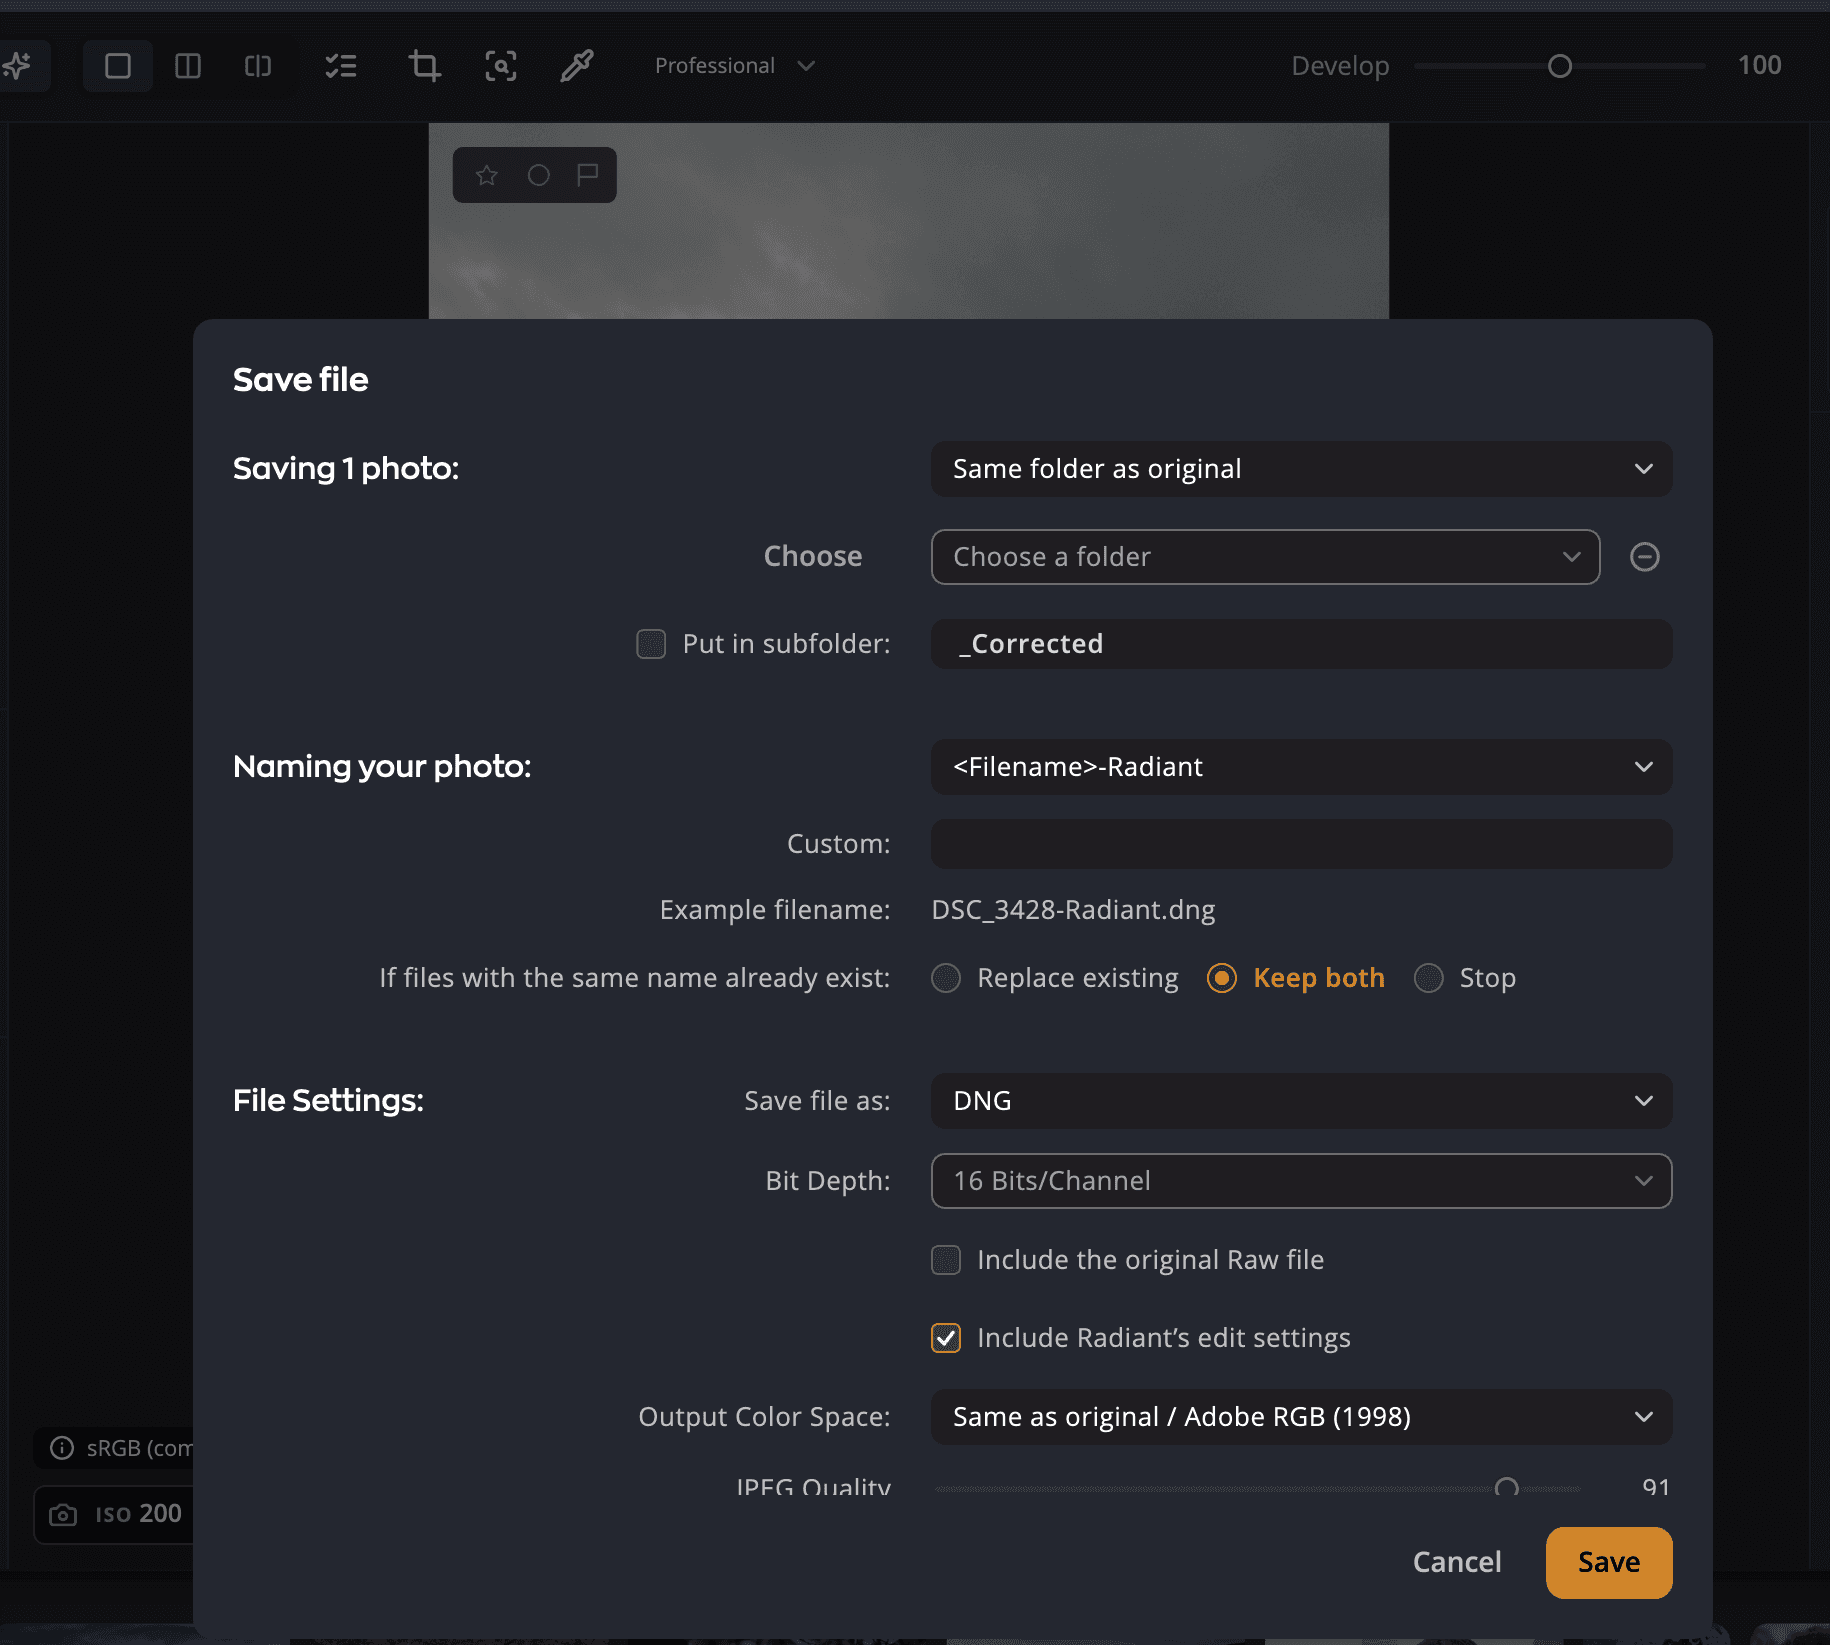
| # | Control | Default | What it does |
|---|---|---|---|
| 1 | DNG in Save file as: | — | Saves the edit as a 16-bit Linear DNG. Bit depth is always 16-bit. |
| 2 | Include the original Raw file | Off | Stores the camera raw file inside the DNG, so it can be taken out again later. Ignored for photos that aren't raw files. |
| 3 | Include Radiant’s edit settings | On | Stores the photo's Radiant Photo settings inside the DNG. |
If your export settings remove metadata, the original raw file is always left out, because it can't be filtered. The dialog says The original Raw file is left out: your export settings remove metadata, and the Raw file keeps all of it.
Tip
Use Convert Raw to Linear DNG… to archive or hand off the original raw. Use DNG in the Save dialog to deliver your finished edit in a raw-style container.