
Black & White
The Black & White tool turns your photo into a black-and-white image you control zone by zone. Decide how bright each color becomes in gray, darken a blue sky for drama, or brighten skin for a luminous portrait. You'll find Black & White in the right panel; press B to open it.
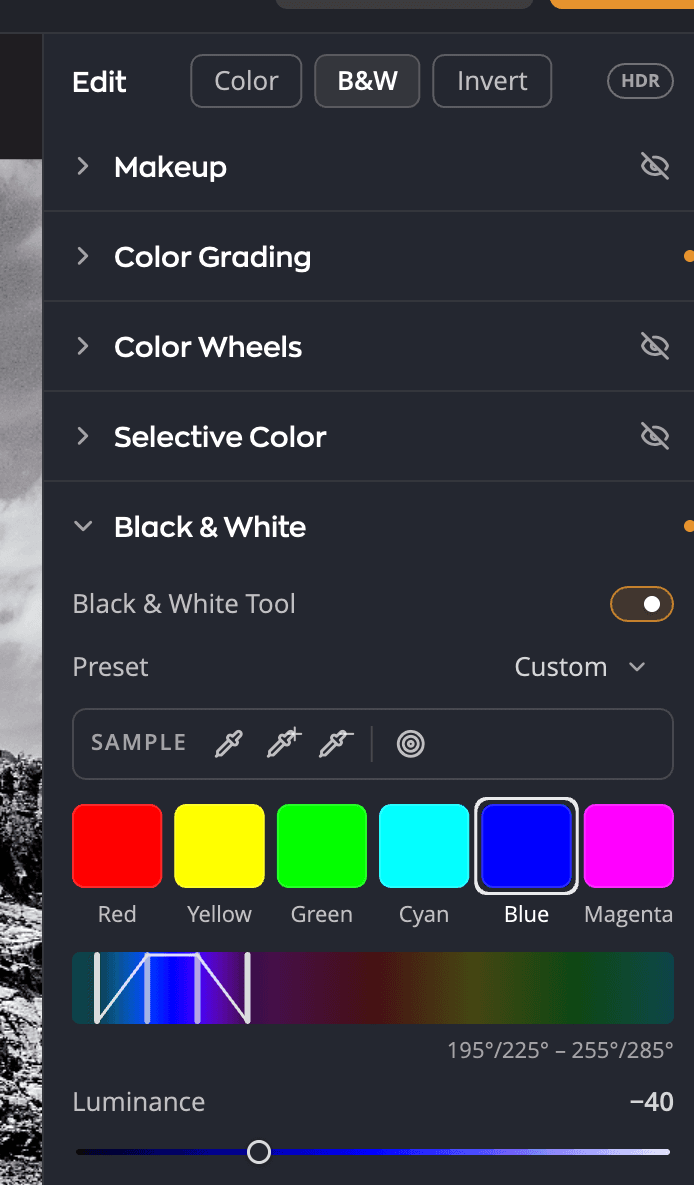
| # | Control | What it does |
|---|---|---|
| 1 | B&W | In the Edit header above the panels: switches the photo to black and white. |
| 2 | Black & White Tool | Turns the conversion on or off. |
| 3 | Preset | Built-in conversions, including classic lens filters, and your own. |
| 4 | Sample tools | Retarget a zone, extend or narrow its range, or drag on the photo. |
| 5 | Zone chips | Reds, Yellows, Greens, Cyans, Blues, Magentas. |
| 6 | Hue ramp | The range of colors the zone covers, and how softly it fades. |
| 7 | Luminance | How bright that zone's colors become in gray. |
Convert a photo
Click B&W in the Edit header at the top of the right panel. Or open Black & White and turn on the Black & White Tool. Both do the same thing, and either one shows the other's state. Click Color in the header to go back.
Shape the conversion
Most black-and-white tools give you a fixed set of color sliders. This one uses zones you can move: if your photo has no red, move the red zone to a color that is there.
- Click a zone chip, or click the photo with the Retarget eyedropper to move the selected zone to that color.
- Drag Luminance (−100 to +100, default 0). Left makes that zone's colors darker gray; right makes them lighter.
- Repeat for other zones.
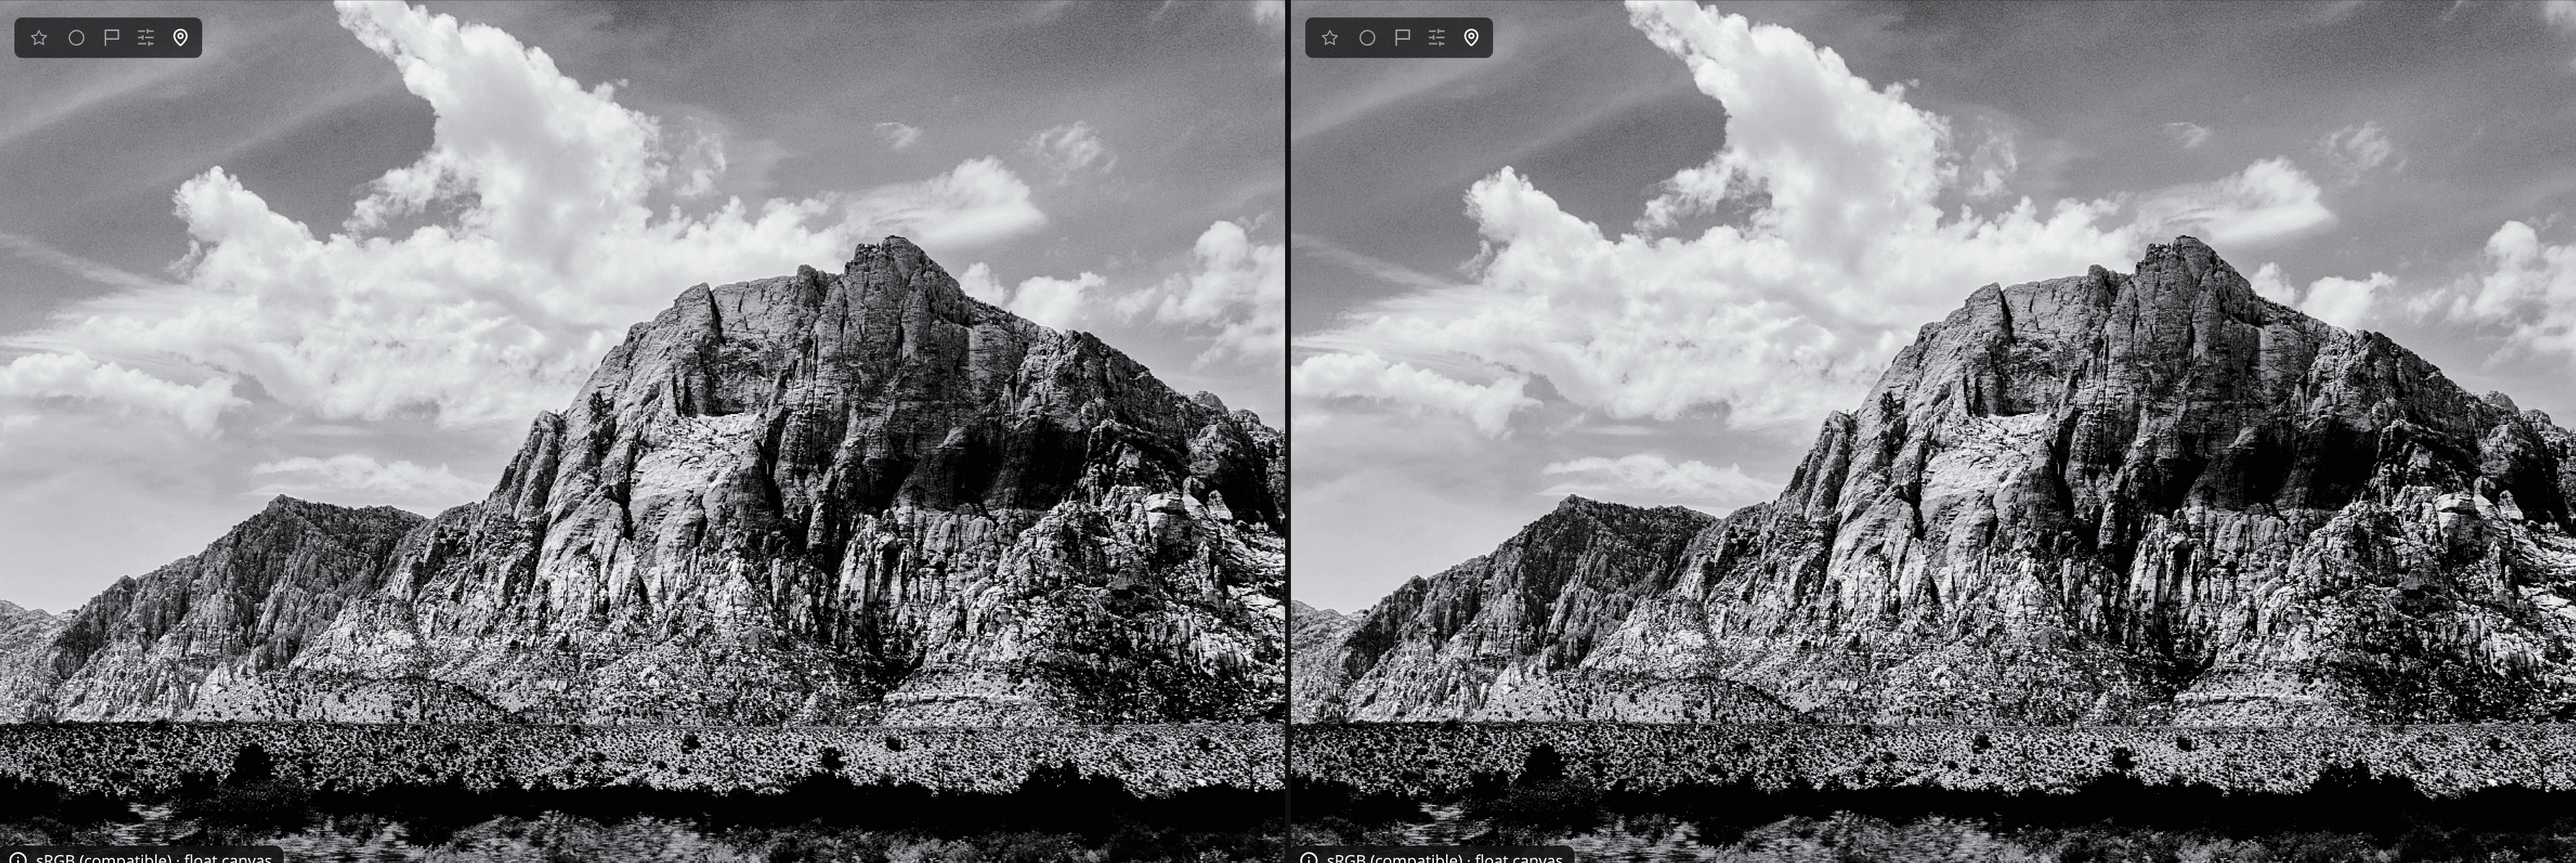
You can also drag on the photo. Click the targeted adjustment button in the Sample tools, then press on a color and drag up or down to change its luminance.
Fine-tune a zone
- Extend range eyedropper: widens the zone to include a color you click.
- Narrow range eyedropper: narrows the zone to leave out a color you click.
- Double-click a zone chip to set its Zone hue center precisely.
On the hue ramp, the inner handles set the colors the zone affects at full strength and the outer handles set how far it fades. Soft fades give smooth, halo-free transitions without painting a mask.
Presets
The Preset menu has conversions that mimic classic lens filters, such as a red filter for dark, dramatic skies. A second group leaves one color in the photo while the rest turns gray, for a partial-color look. Under Manage, choose Save preset… to keep your own conversion.
Tip
For a filmic black and white, add a black-and-white Look in Color Grading on top of your conversion. A black-and-white Look starts at a Strength of 100.
Invert
Invert in the Edit header turns the photo into a negative. It belongs to the Black & White section, so the section's eye turns it off and its reset returns the photo to Color.
Things to know
- Selective Color pauses while the photo is in B&W or Invert. Its values are kept for when you return to Color.
- To start over, hold the pointer over the Black & White header and click its reset button. The zones go back to their defaults, and the photo returns to Color.