
Portrait tools
The portrait tools retouch the people in your photos: eyes, faces, skin and makeup. They find every face for you and tune each correction to that face. You'll find them in the right panel, between Details and Color Grading.
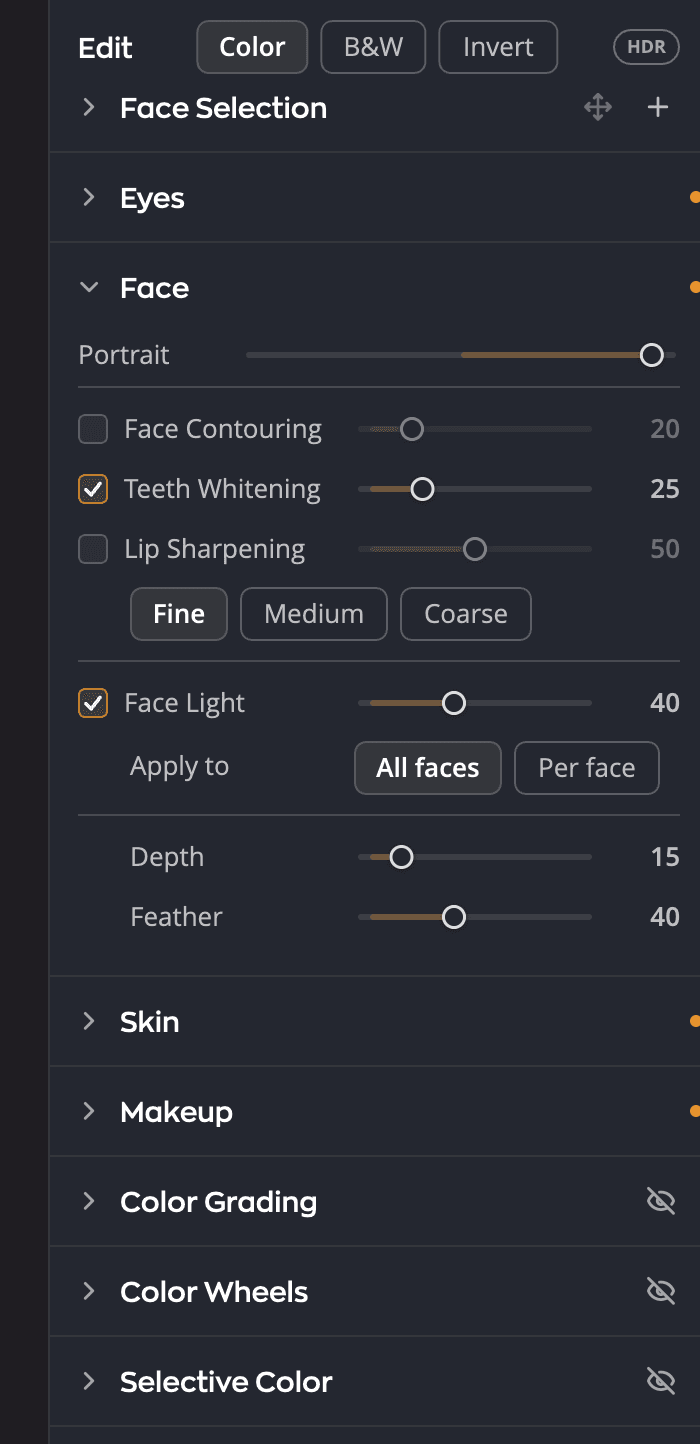
| # | Section | Key | What it does |
|---|---|---|---|
| 1 | Face Selection | A | Shows the faces Radiant Photo found, and lets you add, move or remove one. |
| 2 | Eyes | E | Brightens and enlarges eyes, reduces dark circles and adds catchlights. |
| 3 | Face | F | Contours the face, whitens teeth, sharpens lips and lights the face. |
| 4 | Skin | S | Smooths skin, removes blemishes and tones down shine. |
| 5 | Makeup | M | Adds foundation toning and blush. |
| 6 | Portrait | The master slider at the top of Face. It scales the retouch as a whole. |
How they work
When a photo opens, Radiant Photo looks for faces. The Eyes, Face, Skin and Makeup corrections then apply to every face it found, each tuned to that face. A setting of 50 can mean a little more for one person and a little less for another, so a group photo still looks natural.
Face detection runs on your computer. You don't have to select a face first: the portrait tools always work on every face in the Face Selection list.
Note
If a face is missing from Face Selection, the portrait tools skip that person. Add the face by hand. See Face Selection.
Retouch a portrait
- Choose the Portrait workspace from the workspace menu in the toolbar. It shows the portrait sections and hides the tools you rarely need for people.
- Check Face Selection (press A). Every person you want retouched should have a thumbnail.
- Open each section and adjust it. Dragging a slider turns its tool on.
- Use the Portrait slider at the top of Face to make the whole retouch stronger or gentler.
Scale the whole retouch
The Portrait slider runs from 0 to 200 (default 100). It scales seven retouching tools together: Eye Enhancement, Dark Circles, Perfectly Smooth, Blemish Removal, Shine Removal, Face Light and its Depth. Below 100 the retouch is gentler, and above 100 it is stronger. Double-click the slider to put it back at 100.
A tool that is at 0 stays at 0, so the slider never adds a correction you didn't use. It works like the Develop slider in the toolbar, but only for the people in the photo.
Skin Tone is separate
The Skin Tone section corrects the color of skin across the whole photo, people or not. It sits above Details, apart from the portrait tools. See Skin Tone.
Tip
To frame faces as well as retouch them, use Portrait in Crop & Straighten (⌥⌘K, Ctrl+Shift+K on Windows). See Crop & Straighten.